
It’s hard to be productive and stay focused when elements of your projects are scattered across different platforms. This also creates the risk of missing important details or timelines, leading to delays and other issues.
ClickUp is a cloud-based project management software platform that is easy to understand, scalable, and could be used to fit any project management strategy. With it, you can plan, track, and manage projects all in one place.
It is also more affordable than the alternatives and offers integrations, automations, and collaboration tools. In this article, you’ll learn everything you need to know to use ClickUp for project management.
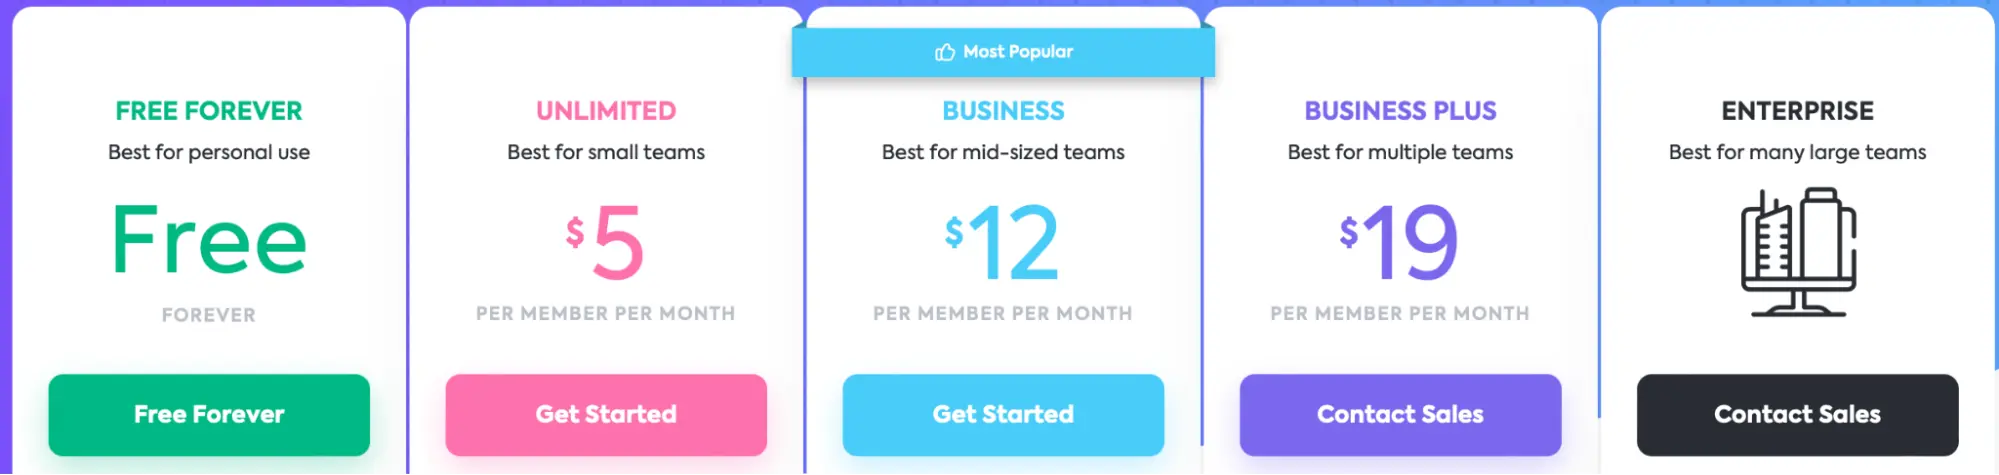
ClickUp is one of the best project management tools, but what exactly sets it apart? First, it’s more affordable than many other project management platforms.
It also has a mobile app, real-time reporting, multiple views, and many other features. Above all, its most significant benefit is its Project Hierarchy, designed to enable you to progress toward long-term goals while keeping sight of every small step needed to get there.
So, let’s discuss all the components of ClickUp’s Project Hierarchy, from top to bottom.

To make smart data-driven decisions and spot bottlenecks in your productivity, ClickUp gives you a bird’s-eye view of all your KPIs in the Dashboard. It includes widgets or “cards” (like pie charts, chats, and text blocks) you can edit and move around.

In ClickUp, Workspaces are like the office building that houses your company or small business. You can create multiple Workspaces with a ClickUp account, accept an invitation to one, and switch between them.
Within Workspaces, there are customizable Spaces. These are for high-level categorizations like teams, departments, or different types of work. You can enable or disable ClickApps in each Space and set default view settings.

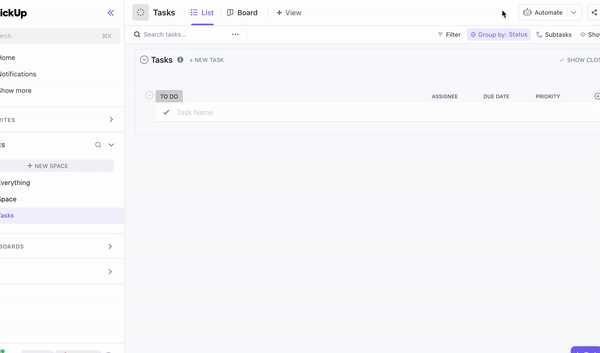
In each Space, you can create standalone Lists that include your tasks. If you want to group multiple Lists, add them to a Folder, like an Idea Inbox. Folders are optional, but they can help keep things organized.

Finally, we come down to tasks. In ClickUp, each task can have a description, status, priority, and due date. You can also add assignees, attachments, and comments. In addition, each task can contain subtasks, nested tasks, and checklists.

As we all know, to achieve any impactful goal, you must break it down into chunks. ClickUp lets you do that, so every goal appears within reach. You can also switch between multiple views to visualize your progress.

So, this was a brief walkthrough of ClickUp’s Hierarchy. Understanding the components of ClickUp is beneficial for efficient project management. Now, let’s discuss how you can work with your team on ClickUp.
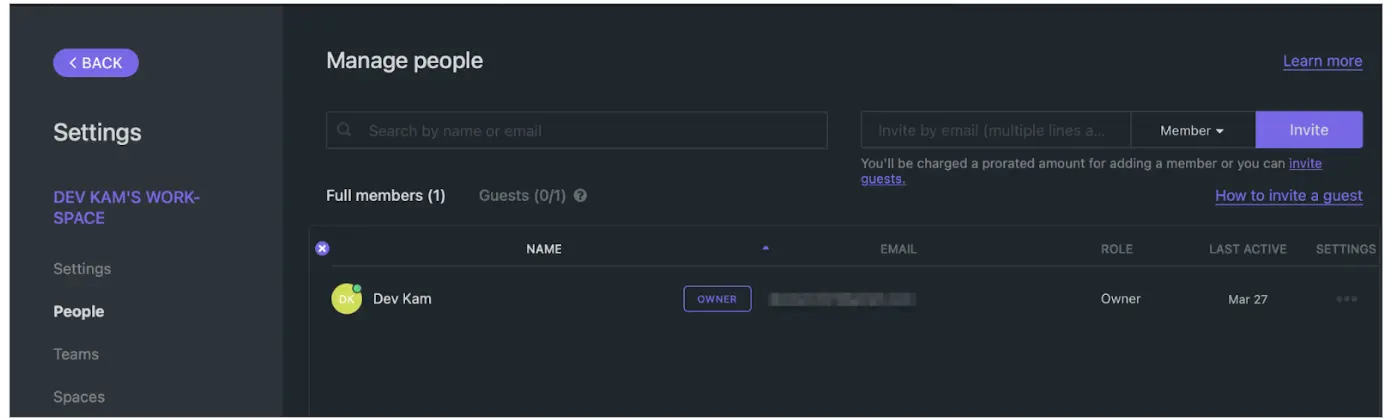
To make any project successful, you need a team. Once you create your Workspace in ClickUp, the next step is to bring in other members. At the bottom-left corner of the screen, click on your profile icon, and choose People.
You can add guests and members to your Workspace on the Manage People page to ensure it stays teeming with activity. Invite members via email and specify their roles, like Guest, Member, or Admin.
Once the members have accepted your invite, ClickUp offers many communication features to keep your team focused and on track. You can add a chat view, let them add comments to tasks, and use Whiteboards to brainstorm.
You can also integrate Slack or email into ClickUp for direct notifications and updates. And that takes us to our next section: integrations and automations.
One of the major benefits of ClickUp is its integration power. Using integrations, you can connect other web apps to ClickUp and consolidate the project management workflow across your organization. Click on your profile icon at the bottom-left corner of the screen and click on Integrations.

To save time, be sure to try out ClickUp native automations. Click Automate in the upper-right corner of the screen, and create custom automations or choose from pre-built ones.
Outside of native ClickUp automations, you can also check out many third-party automation platforms like Bardeen.
A workflow automation extension for Chrome, it operates locally on your desktop and is free to get started with. It works with OpenAI and many popular apps like Asana and Notion.
Here are some ClickUp automations in Bardeen that are worth trying out.
This automation is also available for Upwork. We also offer automations related to product development, personal productivity, and data sourcing.
Thanks to its flexible and scalable structure, ClickUp is suitable for organizations of any type and size, from solopreneurs and small businesses to large companies. We hope you found this article helpful in getting started with ClickUp and using it for project management.
Now, time to put what you’ve read into action. Sign up for ClickUp and create your Workspace. Next, you can create separate Spaces and add Folders and Lists.
If you find yourself doing repetitive actions in ClickUp, try Bardeen today and see how it can help!

SOC 2 Type II, GDPR and CASA Tier 2 and 3 certified — so you can automate with confidence at any scale.


