Adding a new user to your HubSpot account is a straightforward process that can be completed in just a few steps. In this guide, we'll walk you through the process of adding a user to your HubSpot account, from understanding the prerequisites to setting permissions and sending invitations. By the end of this guide, you'll be able to confidently add new users to your HubSpot account and manage their access levels with ease.
Preparing to Add a New User
Before adding a new user to your HubSpot account, it's important to understand the prerequisites and consider the appropriate access level for the user. Here's what you need to know:
Ensure you have the necessary account permissions to add users. You'll need to be an account admin or have user management permissions.
Check that you have available seats in your HubSpot subscription. If you've reached your user limit, you may need to upgrade your plan or remove inactive users.
Review the different types of user roles and permissions available in HubSpot. These include:
Admin: Full access to all features and settings
Marketing: Access to marketing tools and content
Sales: Access to sales tools and customer data
Service: Access to customer service tools and tickets
Consider the user's role within your organization and assign the appropriate permissions accordingly. By carefully planning and understanding these prerequisites, you'll be well-prepared to add a new user to your HubSpot account smoothly and efficiently. For a comprehensive guide on automating enrichment and qualification, check out our resources.
Accessing User Management Settings
To add a new user to your HubSpot account, you'll need to access the user management settings. Here's how:
Log in to your HubSpot account and navigate to the main dashboard.
Click on the settings icon in the top right corner of the screen. This will open the main settings menu.
In the left sidebar, look for the 'Users & Teams' section and click on it.
Once you're in the 'Users & Teams' area, you'll see an overview of all current users and their roles. To add a new user, follow these steps:
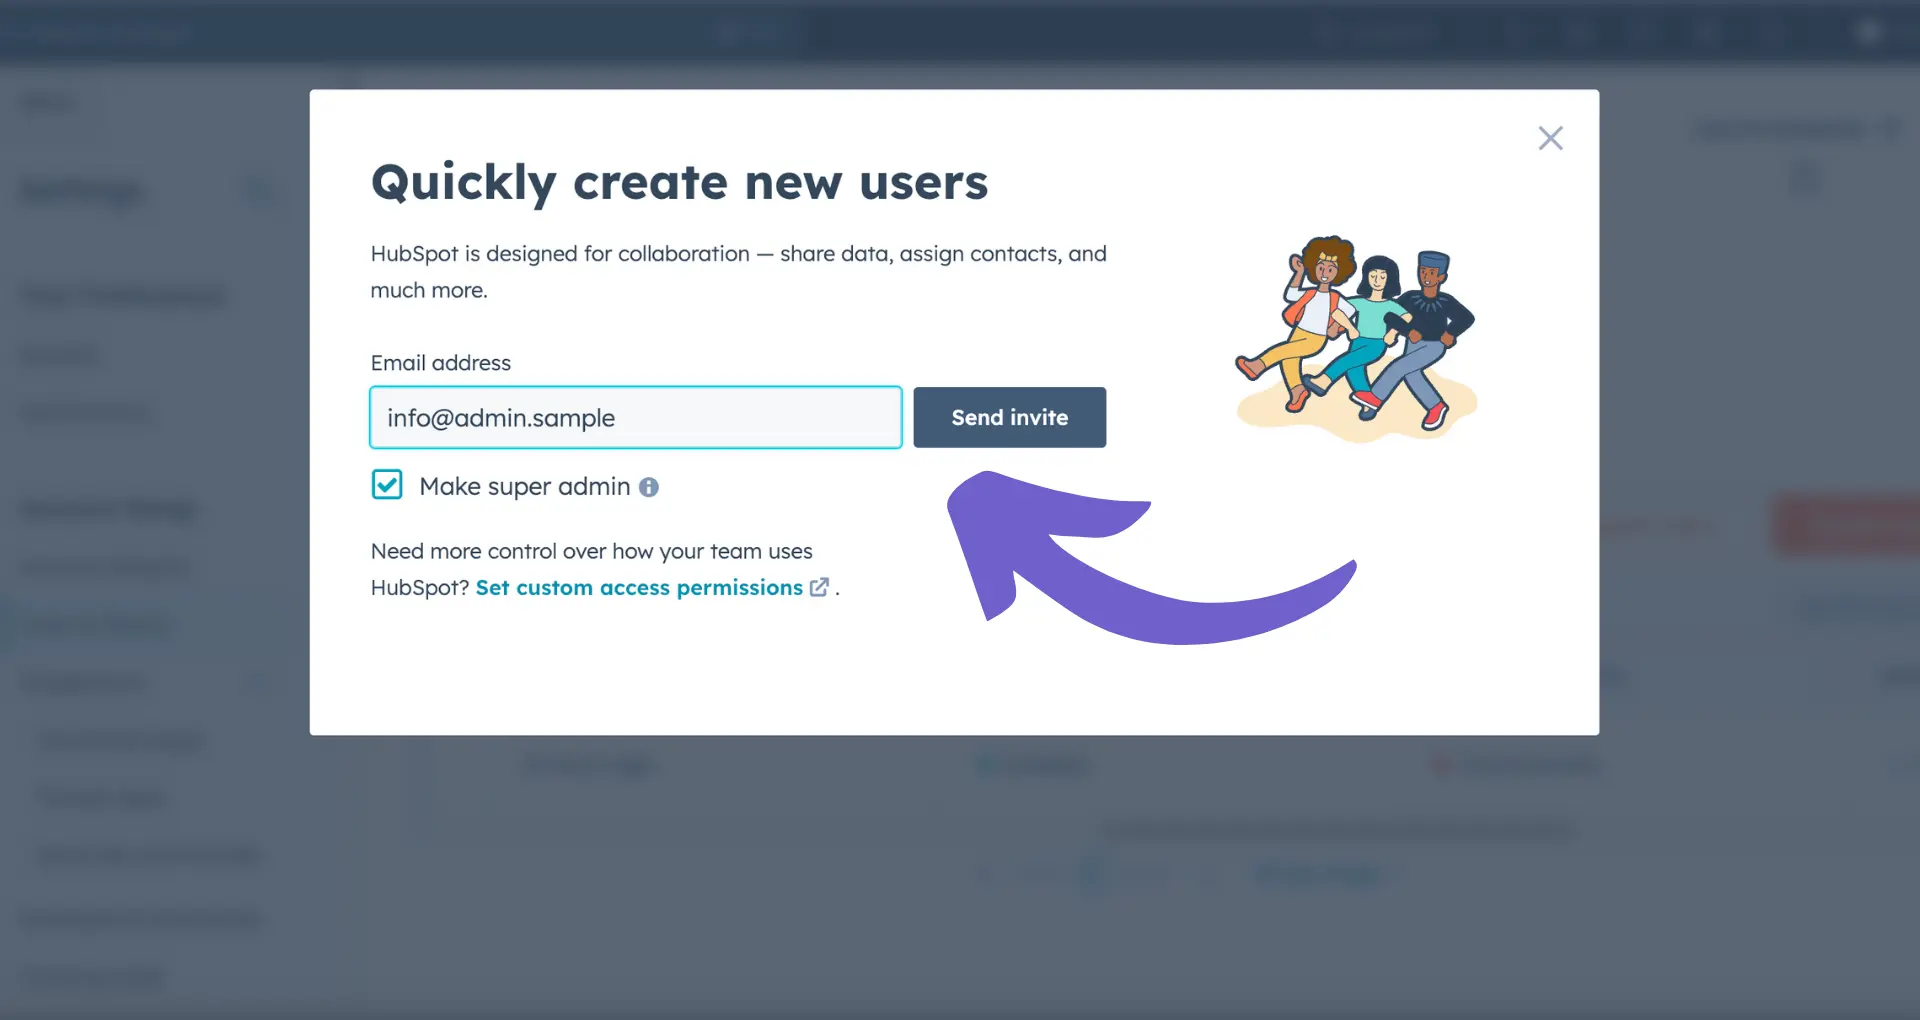
Click on the 'Create user' button in the top right corner of the screen.
A new window will appear where you can enter the details of the new user you want to add.
For those managing large teams, consider using sales prospecting tools to enhance efficiency. By accessing the user management settings, you're now ready to input the necessary information to create a new user account and assign the appropriate permissions.
Bardeen can help you save time by automating repetitive tasks such as user management. Use Google Sheets integration to efficiently manage and update user information in bulk.
Adding User Details
Once you've accessed the user management settings and clicked on the 'Create user' button, a new window will appear where you can enter the details of the new user you want to add. Here's what you need to do:
Enter the new user's email address in the designated field. Make sure to double-check the email address for accuracy to avoid any issues with the invitation email being sent.
Fill in any other required details, such as the user's first and last name, job title, or phone number, depending on your organization's setup. For bulk data retrieval, consider using a LinkedIn phone number extractor.
Decide whether you want to send the invitation email immediately or set up the account first before notifying the new user. If you choose to send the invitation later, you can do so from the user management dashboard after completing the setup process.
By carefully inputting the new user's details and selecting the appropriate invitation option, you'll ensure a smooth onboarding process for your new team member. For more efficient processes, you can generate emails with AI.
Setting Permissions and Access Levels
After adding a new user's details, the next crucial step is to assign specific roles and access permissions based on their responsibilities within your organization. HubSpot offers a comprehensive set of permission options to ensure each user has the appropriate level of access to the tools and features they need.
To set permissions accurately, follow these steps:
Review HubSpot's detailed permissions guide to understand the available options and their implications. This guide will help you make informed decisions about granting access to various tools, features, and data.
Identify the user's role within your company and determine which tools and features they require to perform their job effectively. Consider their level of responsibility and the sensitivity of the data they will be handling.
Assign the appropriate permissions to the user based on their role and requirements. Be mindful not to grant excessive access, as this can pose security risks and lead to unintended changes or deletions.
If your organization has predefined user roles or permission sets, select the most suitable one for the new user. This will help maintain consistency and streamline the permission assignment process.
For more granular control, customize the user's permissions by toggling individual access levels for specific tools and features. This allows you to tailor the user's access to their exact needs.
By carefully setting permissions and access levels for each new user, you can ensure the security and integrity of your HubSpot account while empowering your team to work efficiently within their designated roles. For more tips on improving sales processes, check out how to automate sales prospecting.
Save time by using Bardeen to automate sales prospecting. Let Bardeen handle repetitive tasks so you can focus on closing deals.
Reviewing and Sending Invitations
Before finalizing the user addition process, it's crucial to review the user's information and assigned roles for accuracy. This step ensures that the new user will have the appropriate access and permissions within your HubSpot account.
Double-check the user's email address to make sure it is correct and belongs to the intended individual. Verify that the email domain is accurate and matches your organization's domain, if applicable.
Review the assigned user roles and permissions to confirm they align with the user's job responsibilities and the level of access they require. Make any necessary adjustments to the permissions at this stage.
Once you have verified the user's information and permissions, click the "Send invitation" button to initiate the invitation process.
Upon sending the invitation, the new user will receive an email with instructions on how to complete their account setup. The email will contain a unique link that the user must click to set their password and access their HubSpot account for the first time.
To ensure a smooth onboarding process, consider providing the new user with additional guidance or resources, such as:
A welcome message explaining their role and responsibilities within the HubSpot account
Contact information for a designated team member who can assist with any questions or issues during the setup process
By carefully reviewing and sending invitations to new users, you can maintain the security and integrity of your HubSpot account while ensuring that your team members have the tools and access they need to succeed.
Troubleshooting Common Issues
When adding new users to your HubSpot account, you may encounter some common issues that can prevent them from accessing the system or utilizing certain features. Here are a few potential problems and their solutions:
User not receiving the invitation email: If the new user doesn't receive the welcome email within a few minutes, check that their email address was entered correctly. Also, ask them to check their spam or junk mail folder. If the issue persists, contact your IT department to ensure that emails from HubSpot are not being blocked by your organization's firewall.
User unable to access certain features: Verify that the user has been assigned the appropriate roles and permissions. Review their access levels and make any necessary adjustments in the user management settings. If the problem continues, try removing and re-adding the user to the account.
"User already exists" error message: This message appears when you attempt to add a user who has previously been associated with a HubSpot account. To resolve this, click the "Next" button to proceed with the user setup process. The user can update their information in their profile and preferences after logging in.
User cannot log in: If a user is having trouble logging in, first confirm that they are using the correct email address and password. If they have forgotten their password, guide them through the password reset process. In case the issue persists, contact HubSpot support for further assistance.
If you encounter any other issues not listed here, consult the HubSpot Knowledge Base or reach out to HubSpot's support team for help. They can provide tailored solutions and troubleshoot any unique problems you may face when adding new users to your account. For more advanced tasks, you might want to automate sales prospecting to ensure efficient user management.
Save time and focus on important tasks by using Bardeen to automate sales prospecting. It simplifies repetitive work, ensuring efficient management.
Managing and Organizing Users
As your team grows and your HubSpot usage expands, it becomes increasingly important to organize users into teams for better management and access control. By creating teams and assigning users to them, you can ensure that each user has the appropriate level of access to the tools and data they need to perform their roles effectively.
HubSpot provides powerful tools to help you manage user groups and permissions efficiently. Here are some tips to make the most of these features:
Create teams based on roles and responsibilities: Group users into teams that align with their roles within your organization, such as marketing, sales, customer service, or management. This allows you to assign permissions and access levels that are tailored to each team's needs.
Utilize nested teams for complex organizations: If your company has a hierarchical structure or multiple departments, consider using nested teams. This feature allows you to create a team hierarchy, with parent teams having access to the data and tools of their child teams. This streamlines permission management and ensures that managers have the necessary oversight.
Regularly review and update team memberships: As your organization evolves and roles change, it's essential to review team memberships periodically. Remove users who no longer require access and add new team members as needed. This helps maintain the security and integrity of your HubSpot data.
Use team permissions to control access: HubSpot offers granular control over team permissions, allowing you to specify which tools, data, and features each team can access. Take advantage of these settings to ensure that users only have access to the resources they need to fulfill their responsibilities.
By implementing these best practices for managing and organizing users in HubSpot, you can improve your team's efficiency, collaboration, and data security. Regularly reviewing and optimizing your team structure will help you get the most value from your HubSpot investment and ensure that your users have the tools they need to succeed. For more on how to automate sales prospecting, check out our resources.