If you're converting documents, you might love Bardeen's automation for Google Docs. It can save you time and effort by automating document conversion and data transfer.
Converting a Google Doc to a Google Sheet is a straightforward process that can save you time and effort when working with data. In this step-by-step guide, we'll walk you through the process of transforming your Google Docs into organized and functional Google Sheets. By following these simple steps, you'll be able to easily convert your documents and start analyzing your data in no time.
Understanding the Basics of Google Docs and Sheets
Google Docs and Google Sheets are both part of the Google Workspace suite of productivity tools. While they serve different purposes, they can work together seamlessly to help you organize and analyze your data more effectively.
Google Docs is a word processing application that allows you to create, edit, and collaborate on documents in real-time.
Google Sheets, on the other hand, is a spreadsheet application designed for working with structured data, performing calculations, and creating charts and graphs.
Converting a Google Doc to a Google Sheet is particularly useful when you have data in a document that you want to analyze or manipulate using the powerful features of a spreadsheet. By transforming your data into a structured format, you can easily sort, filter, and apply formulas to gain valuable insights and make data-driven decisions. Explore how to bring AI into your spreadsheet for more advanced data analysis.
Preparing Your Google Doc for Conversion
To ensure a smooth conversion process from Google Docs to Google Sheets, it's essential to structure your document with tabular data in mind. Here are some tips to help you organize your data effectively:
Arrange your data in a clear, grid-like format using rows and columns. Each row should represent a single record, while each column should represent a specific attribute or field.
Use consistent formatting throughout your document. Ensure that all data in a column follows the same format (e.g., dates, numbers, or text) to avoid any confusion during the conversion process.
Include headers at the top of each column to clearly identify the type of data it contains. This will make it easier to understand and work with your data once it's in Google Sheets.
By taking the time to structure your Google Doc properly, you'll be able to convert it to a Google Sheet with minimal issues, allowing you to take full advantage of the spreadsheet's powerful data analysis and manipulation features.
To export your data from Google Docs to a format compatible with Google Sheets, follow these step-by-step instructions:
Open your Google Doc containing the tabular data you want to convert.
Click on "File" in the top menu, then select "Download" from the dropdown list.
Choose either "Plain Text (.txt)" or "Comma-Separated Values (.csv)" as the file format, depending on your preference. CSV files are generally more compatible with spreadsheet applications like Google Sheets.
Click "OK" to confirm the download and save the file to your computer.
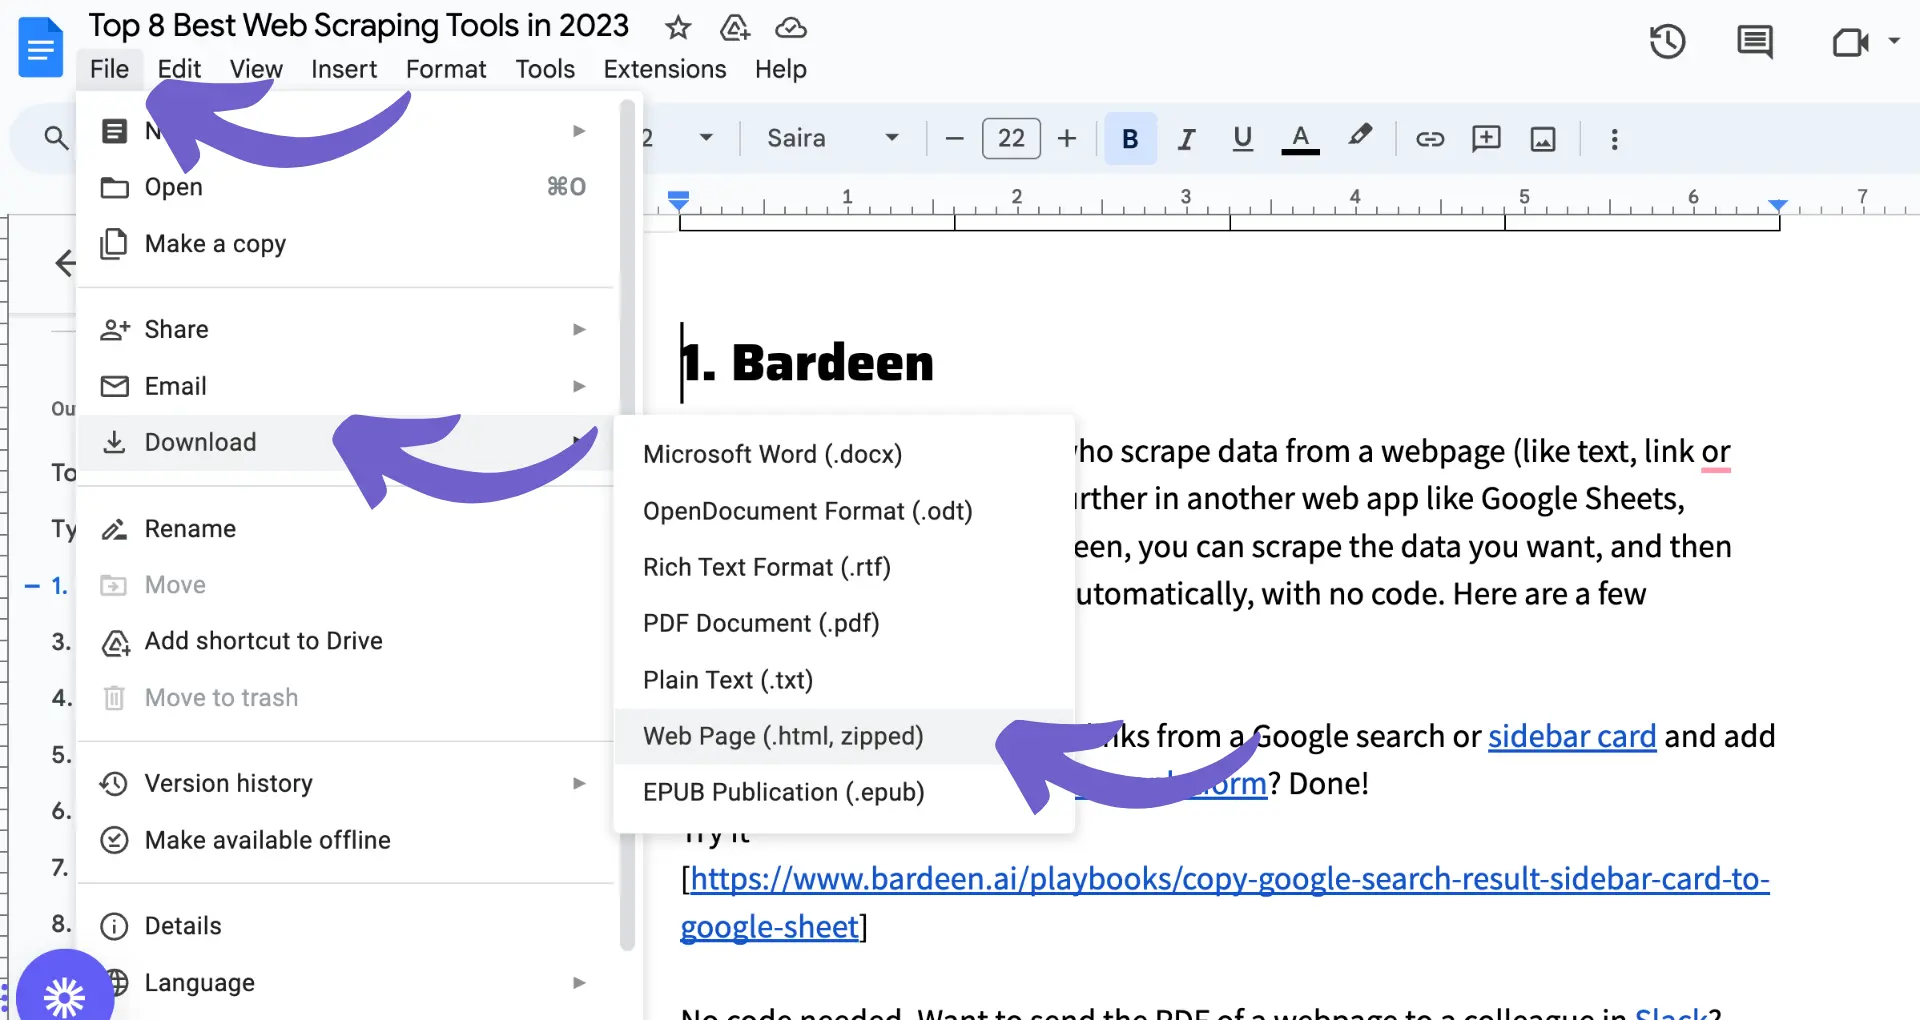
It's crucial to select the appropriate file format during the export process to maintain data integrity. CSV files preserve the structure of your tabular data, ensuring that it can be easily imported into Google Sheets without any loss of information. For more advanced data handling, you can integrate Excel with Google Sheets.
Importing Data into Google Sheets
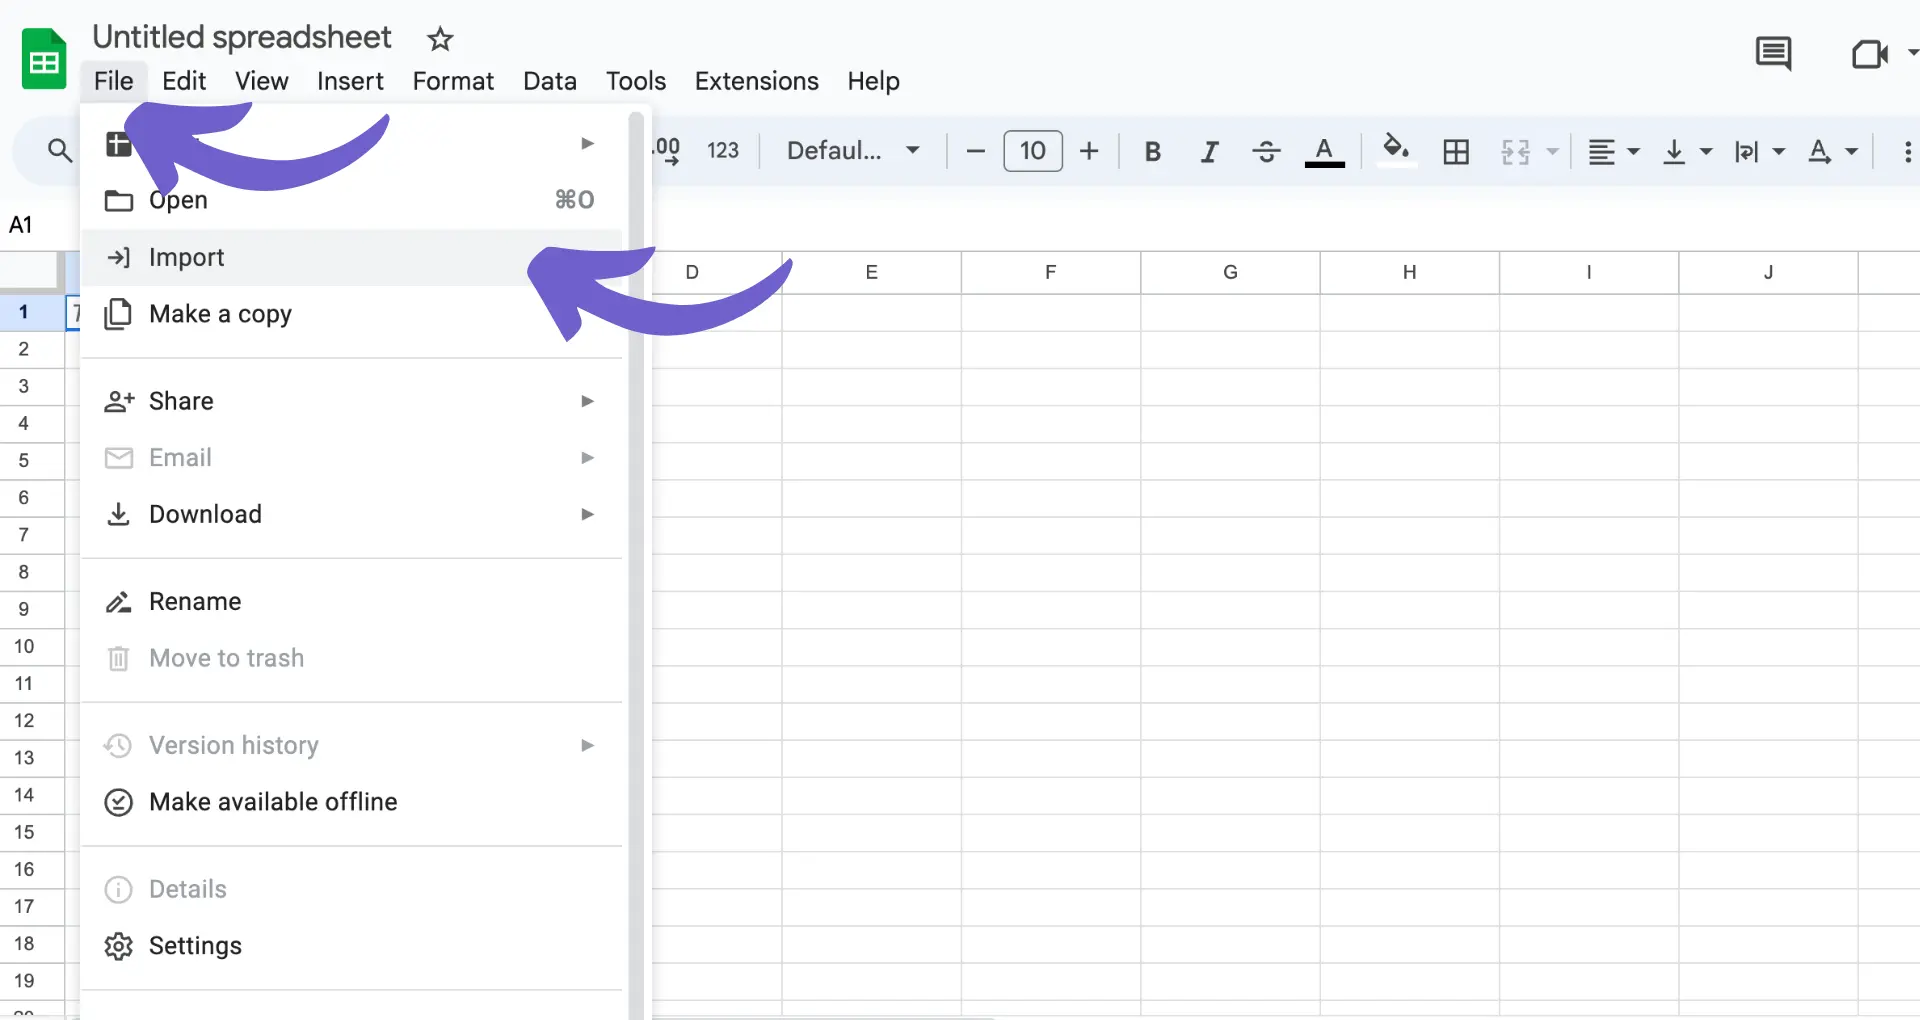
Now that you have exported your data from Google Docs in a compatible format, it's time to import it into Google Sheets. Follow these steps to import your data:
Open Google Sheets and create a new spreadsheet.
Click on "File" in the top menu, then select "Import" from the dropdown list.
In the "Import file" dialog box, click on the "Upload" tab and then click "Select a file from your device."
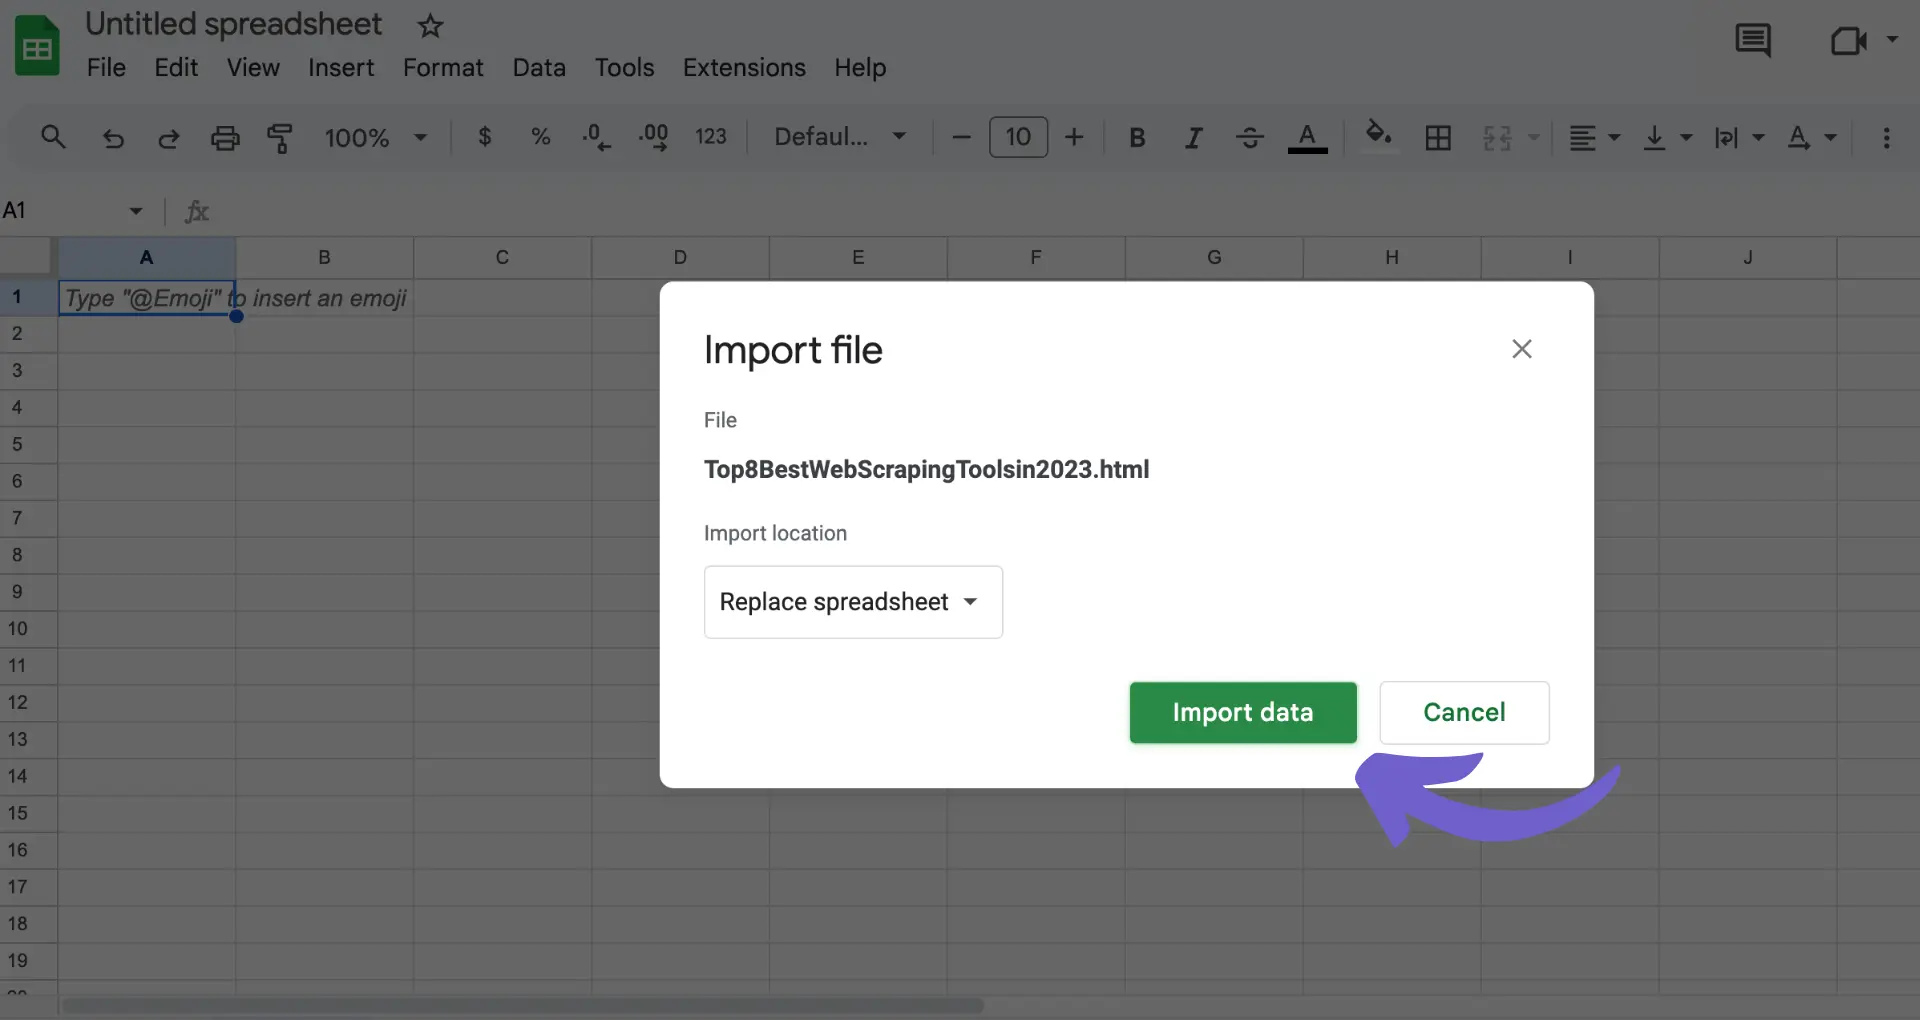
4. Locate and select the exported .txt or .csv file from your computer, then click "Open."
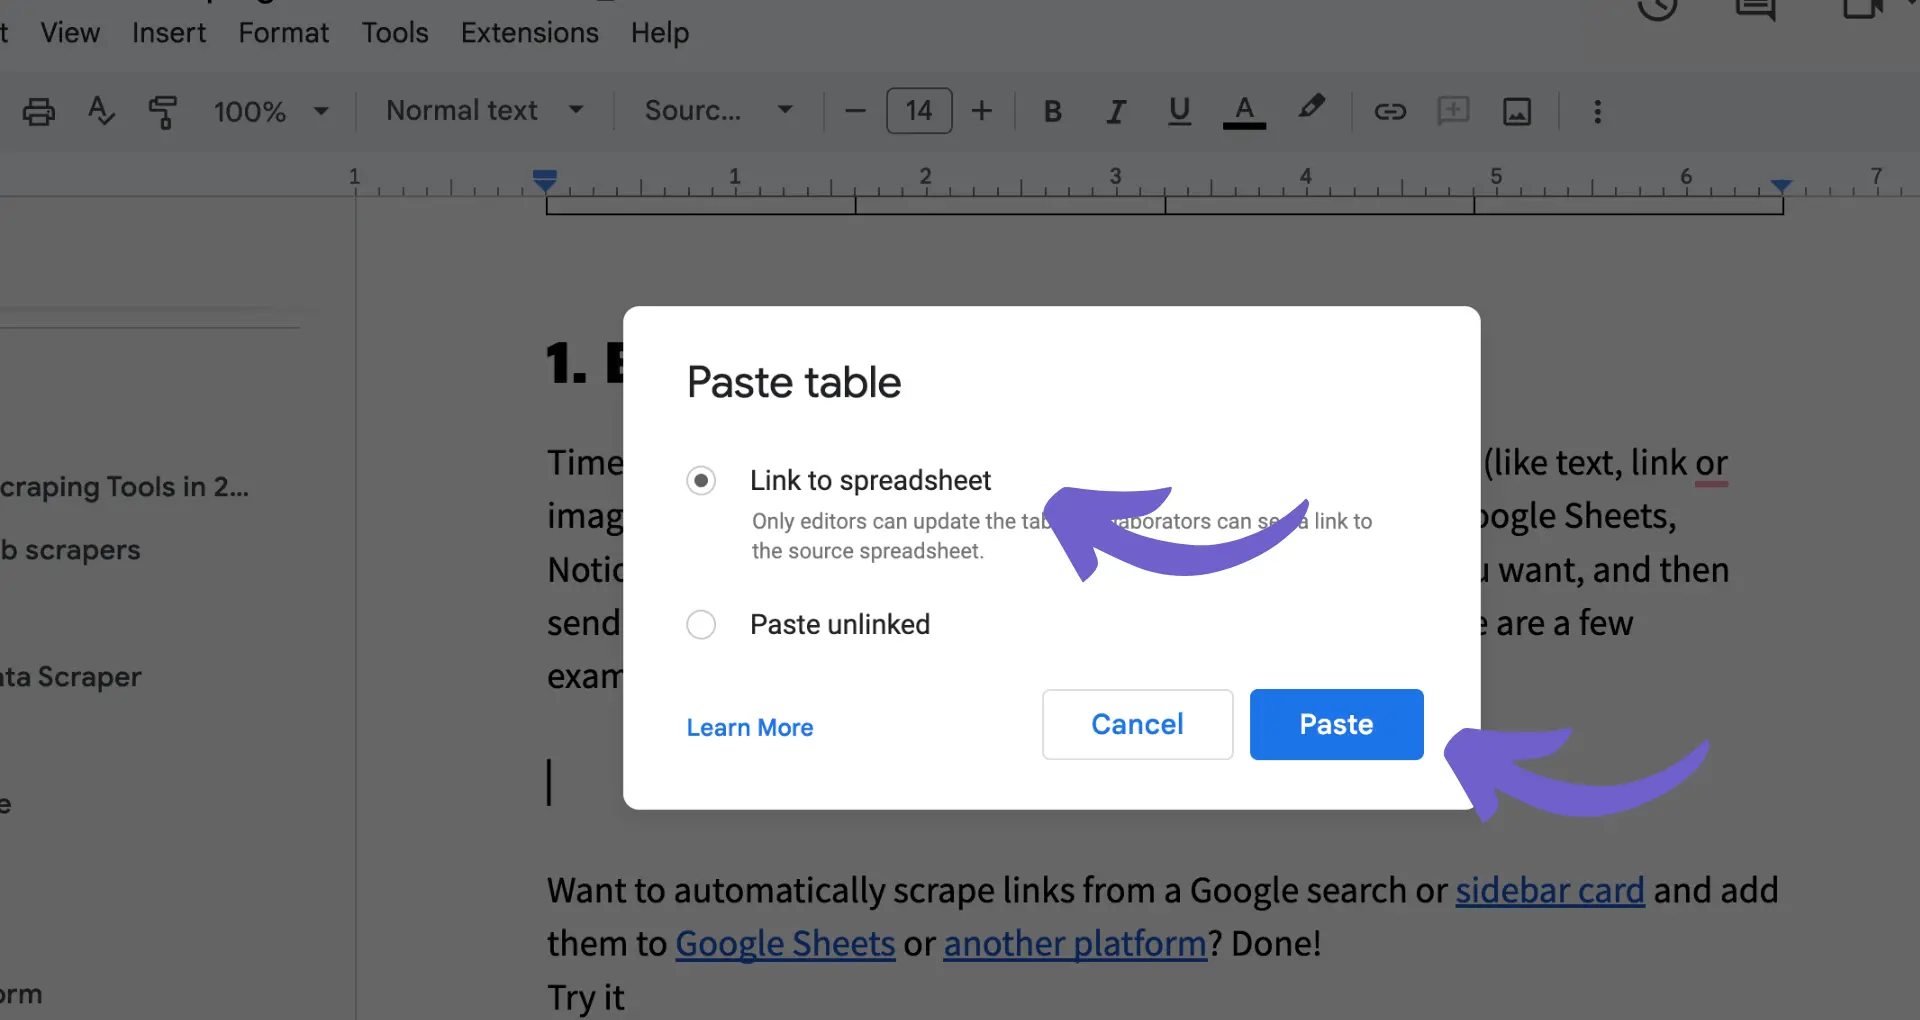
5. Choose your preferred import options, such as "Replace spreadsheet" or "Insert new sheet." "Replace spreadsheet" will overwrite any existing data in the current sheet, while "Insert new sheet" will create a new sheet within the existing spreadsheet to house the imported data.
6. Click "Import data" to complete the process.
Google Sheets offers various options to customize your data import, such as specifying the separator type (comma, semicolon, or tab) and indicating whether your data includes a header row. For more advanced features, you can enrich LinkedIn profiles directly in your sheets. Adjust these settings according to your exported file's format to ensure a smooth import process.
Use Bardeen to enrich LinkedIn profiles in Google Sheets. Save time and make sure your data is up-to-date.
Final Adjustments and Best Practices
After importing your data into Google Sheets, you may need to make some final adjustments to ensure your spreadsheet is organized and easy to read. Here are some tips:
Adjust column widths: Double-click on the right border of a column header to automatically resize the column to fit the content. Alternatively, click and drag the right border to manually adjust the width.
Format text: Use the formatting options in the toolbar to change font size, color, and style. Consistent formatting makes your data more readable.
Check for data accuracy: Review your imported data to ensure everything transferred correctly. Look for missing or misaligned data, and make any necessary corrections.
Use formulas: Formulas help automate calculations and ensure accuracy. Common formulas include SUM, AVERAGE, and IF statements.
Implement data validation: Set up data validation rules to restrict the type of data that can be entered in specific cells, such as numbers only or values from a dropdown list.
Organize with tabs: Divide your data into multiple sheets within the same spreadsheet file to keep related information together while maintaining a clear structure.
Regularly review and update: Periodically check your spreadsheet for errors, inconsistencies, or outdated information. Keep your data current and accurate.
By following these final adjustments and best practices, you'll create well-organized, accurate, and easy-to-understand Google Sheets that effectively convey your data insights.
SOC 2 Type II, GDPR and CASA Tier 2 and 3 certified — so you can automate with confidence at any scale.
Frequently asked questions
What is Bardeen?
Bardeen is an automation and workflow platform designed to help GTM teams eliminate manual tasks and streamline processes. It connects and integrates with your favorite tools, enabling you to automate repetitive workflows, manage data across systems, and enhance collaboration.
What tools does Bardeen replace for me?
Bardeen acts as a bridge to enhance and automate workflows. It can reduce your reliance on tools focused on data entry and CRM updating, lead generation and outreach, reporting and analytics, and communication and follow-ups.
Who benefits the most from using Bardeen?
Bardeen is ideal for GTM teams across various roles including Sales (SDRs, AEs), Customer Success (CSMs), Revenue Operations, Sales Engineering, and Sales Leadership.
How does Bardeen integrate with existing tools and systems?
Bardeen integrates broadly with CRMs, communication platforms, lead generation tools, project and task management tools, and customer success tools. These integrations connect workflows and ensure data flows smoothly across systems.
What are common use cases I can accomplish with Bardeen?
Bardeen supports a wide variety of use cases across different teams, such as:
Sales: Automating lead discovery, enrichment and outreach sequences. Tracking account activity and nurturing target accounts.
Customer Success: Preparing for customer meetings, analyzing engagement metrics, and managing renewals.
Revenue Operations: Monitoring lead status, ensuring data accuracy, and generating detailed activity summaries.
Sales Leadership: Creating competitive analysis reports, monitoring pipeline health, and generating daily/weekly team performance summaries.