Adding Fault Connector in Salesforce Flow: A Step-by-Step Guide

LAST UPDATED
June 24, 2024
Jason Gong
apps
No items found.
TL;DR

Open Flow Builder, click element, and drag Add Fault Path.

By the way, we're Bardeen, we build a free AI Agent for doing repetitive tasks.

If you're working with Salesforce, you might love Bardeen's Agent for sales. It helps with error handling, lead generation, and email outreach. Use it to save time and improve your workflow.

Adding a Fault Connector in Salesforce Flow is crucial for handling errors and ensuring your automated processes run smoothly. In this step-by-step guide, we'll walk you through the process of setting up and configuring Fault Connectors in your Salesforce Flows. By the end of this guide, you'll have the knowledge and tools to effectively implement error handling and enhance the reliability of your automated workflows.

Introduction to Salesforce Flow and Fault Connectors

Salesforce Flow is a powerful tool that allows you to automate complex business processes without writing code. With Flow, you can create workflows that guide users through various tasks, update records, send emails, and more. By automating repetitive tasks and improving sales prospecting, Flow helps you save time and increase productivity.

Salesforce Flow

One essential aspect of building robust Flows is error handling. This is where Fault Connectors come into play. A Fault Connector is a special type of connector in Salesforce Flow that allows you to handle errors gracefully and provide meaningful feedback to users when something goes wrong.

Here are some key benefits of using Fault Connectors in your Salesforce Flows:

  • Improved user experience: Fault Connectors help you display informative error messages to users, guiding them on how to resolve issues.
  • Enhanced reliability: By handling errors effectively, Fault Connectors ensure that your Flows continue running smoothly, even when unexpected issues arise.
  • Easier debugging: Fault Connectors make it easier to identify and troubleshoot problems in your Flows, saving you time and effort.

In the following sections, we'll dive deeper into setting up your Flow for fault handling and walk you through the process of adding a Fault Connector step-by-step. Learn more about connecting Salesforce with AI tools to enhance your workflows.

Setting Up Your Flow for Fault Handling

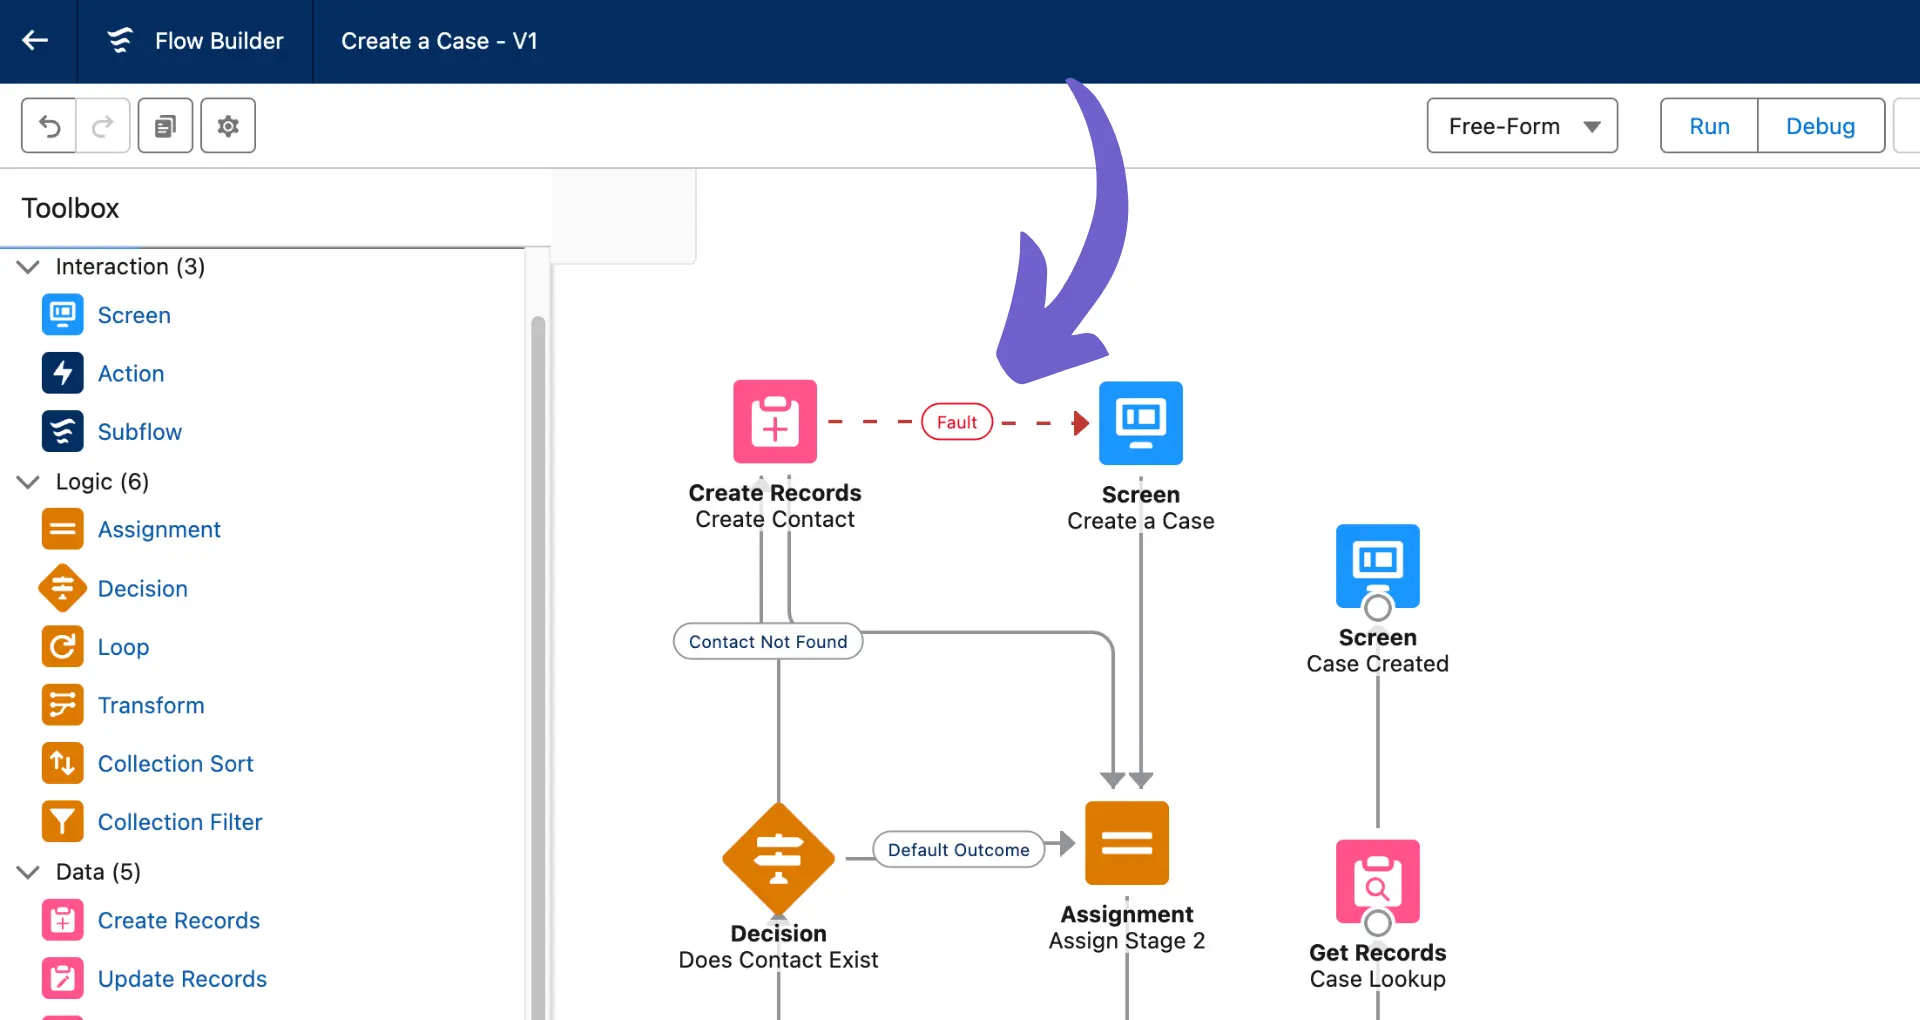
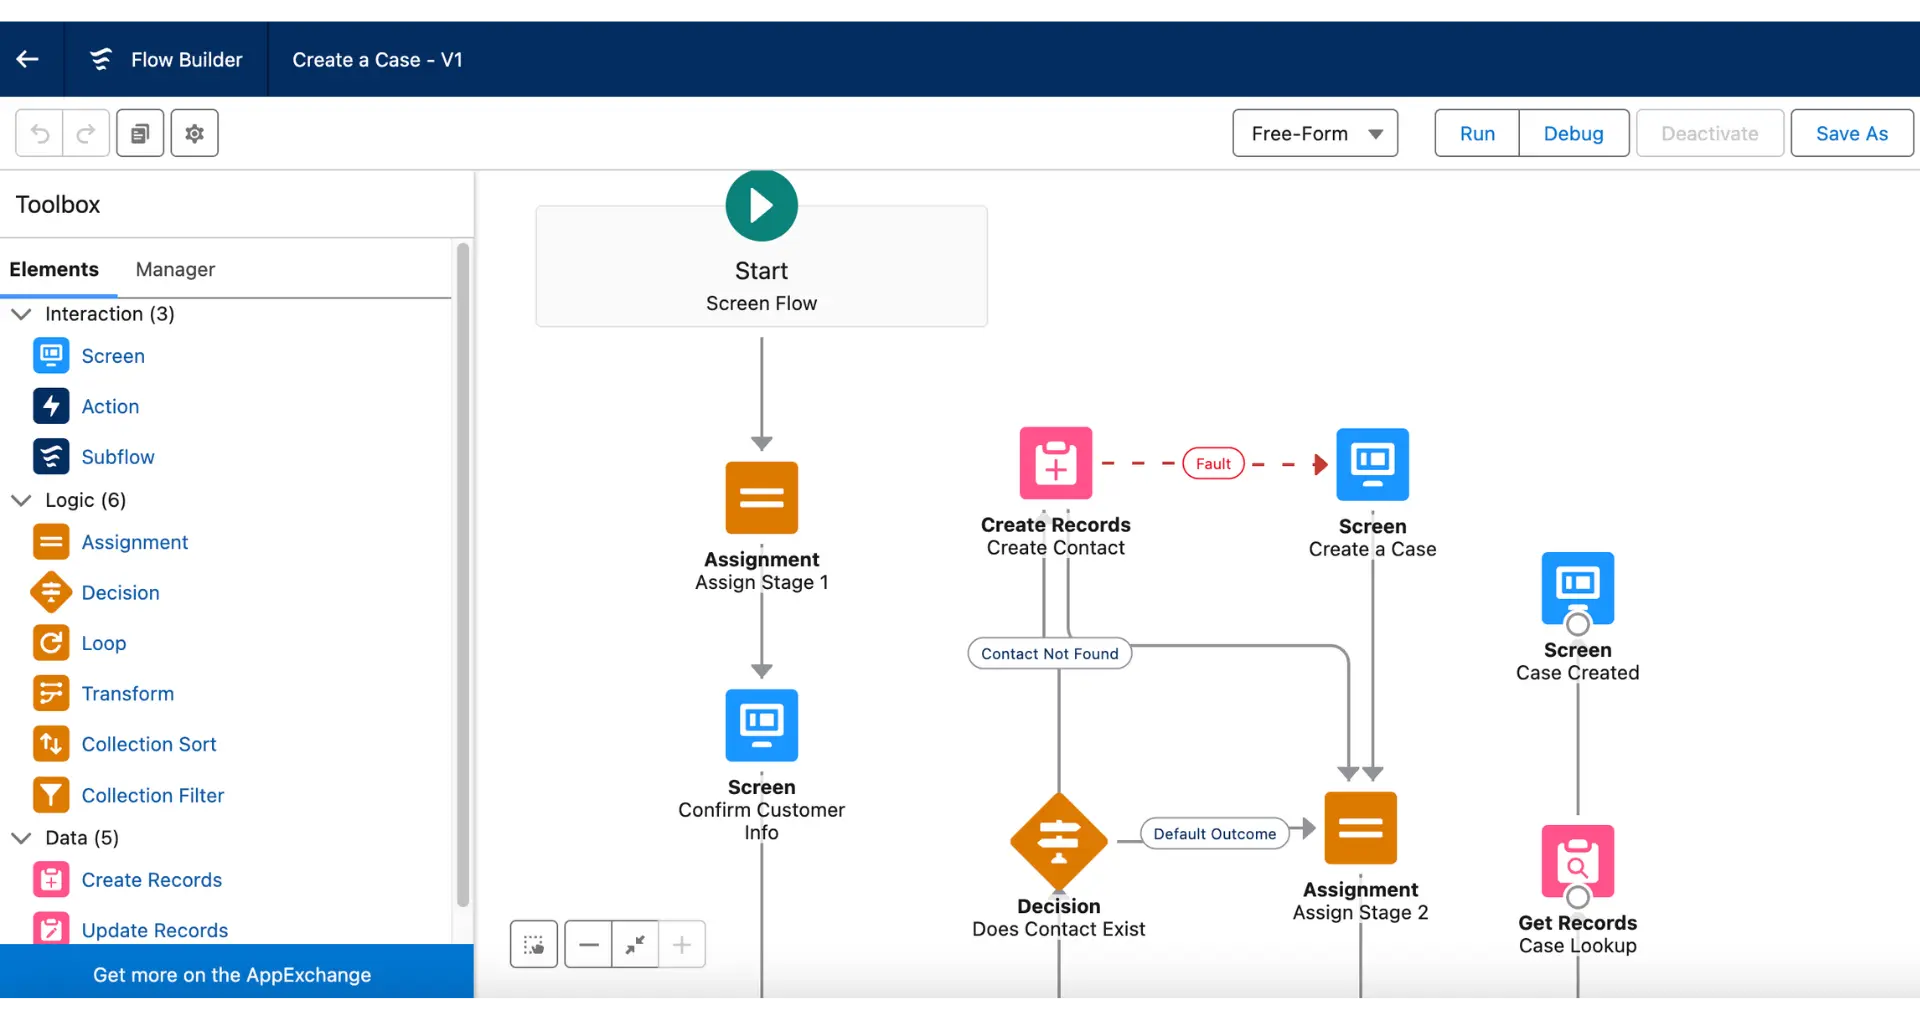
Before you can add a Fault Connector to your Salesforce Flow, there are a few prerequisites you need to consider. Fault Connectors are suitable for any type of Flow, including Screen Flows, Auto-Launched Flows, and Record-Triggered Flows. However, it's essential to identify the specific elements in your Flow where errors may occur.

Follow these steps to prepare your Salesforce Flow for fault handling:

  1. Open your Flow in the Flow Builder.
  2. Review each element in your Flow and consider where errors might happen. For example:
    • A "Get Records" element may fail if the specified record doesn't exist.
    • An "Update Records" element may encounter an error if the user lacks the necessary permissions.
  3. Make a list of the elements that could potentially throw errors. These are the points where you'll want to add Fault Connectors.
  4. Consider the types of errors that may occur at each point and how you want to handle them. This will help you determine the appropriate error messages and actions to take within your Fault Connectors.
Review each element in your Flow and consider where errors might happen

By identifying potential error points in your Flow, you'll be better prepared to implement Fault Connectors effectively.

Save time and avoid errors by using automate lead enrichment. Bardeen helps you focus on critical tasks while automation runs smoothly in the background.

In the next section, we'll guide you through the process of adding a Fault Connector to your Salesforce Flow.

How to Add a Fault Connector in Salesforce Flow

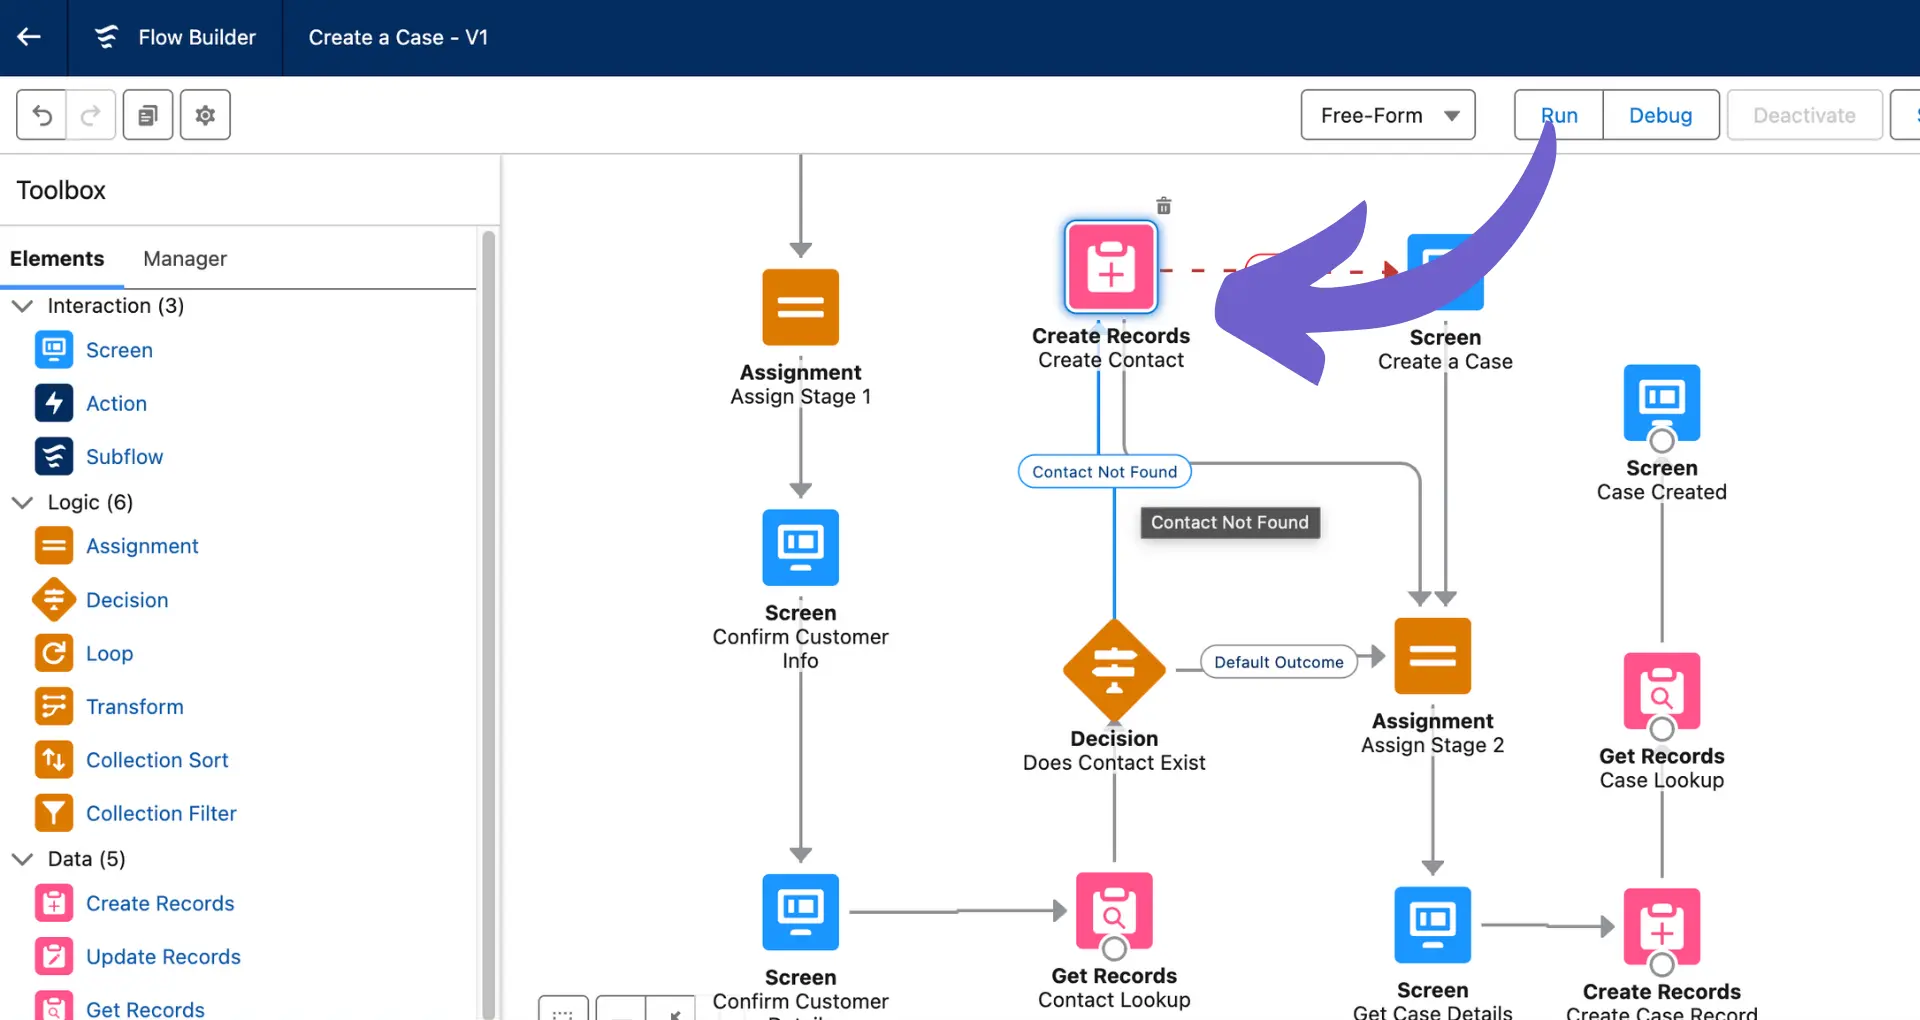
Adding a Fault Connector to your Salesforce Flow is a straightforward process using the Flow Builder. Follow these steps to insert a Fault Connector:

  1. Open your Flow in the Flow Builder.
  2. Identify the element where you want to add the Fault Connector. This should be an element that may potentially throw an error, such as a "Get Records" or "Update Records" element.
  3. Click on the element and drag the "Add Fault Path" connector from the element's node.
  4. Release the connector on the canvas to create a new Fault Connector node.
  5. Double-click the Fault Connector node to open its settings.
  6. Configure the Fault Connector by setting the following properties:
    • Fault Message: Enter a clear, concise message that describes the error to the end-user or administrator.
    • Fault Type: Select the appropriate type of fault, such as "Element Fault" or "Flow Fault."
    • Additional Parameters: Set any additional parameters required for the specific error handling, such as sending an email notification or creating a log record. This can be automated with Google Sheets integrations.
  7. Connect the Fault Connector to the appropriate element in your Flow, such as a "Screen" element to display the error message or a "Create Records" element to log the error.

When connecting elements with a Fault Connector, ensure that the connector is positioned correctly and originates from the element where the error may occur. Double-check that the Fault Connector's settings and parameters are configured accurately to handle the error scenario effectively.

By following these steps and considering the proper placement and configuration of Fault Connectors, you can enhance your Salesforce Flow's error handling capabilities and provide a better experience for your users. For advanced automation, explore AI sales automation.

Best Practices for Configuring Fault Connectors

When configuring Fault Connectors in your Salesforce Flow, it's essential to follow best practices to ensure effective error handling and a smooth user experience. Here are some tips to keep in mind:

  1. Write clear and concise Fault Messages:
    • Provide a brief description of the error that occurred, avoiding technical jargon.
    • Include relevant details, such as the specific record or field that caused the issue.
    • Offer guidance on how to resolve the error, if applicable.
  2. Use descriptive labels for Fault Connectors:
    • Choose labels that clearly indicate the purpose of each Fault Connector.
    • Maintain a consistent naming convention across your Flow for easy identification.
  3. Set appropriate error conditions:
    • Ensure that your Fault Connectors are triggered only for relevant error scenarios.
    • Avoid overly broad error conditions that may catch unintended issues.
  4. Test your Flow thoroughly:
    • Create test scenarios that cover various error possibilities.
    • Verify that Fault Connectors are triggered correctly and display the intended error messages.
    • Test your Flow with different user profiles and permissions to ensure consistent behavior.
  5. Implement proper error handling actions:
    • Determine the appropriate action to take when an error occurs, such as sending an email notification or creating a log record.
    • Ensure that the actions taken do not introduce further errors or complications.

By following these best practices, you can configure Fault Connectors that effectively handle errors, provide informative feedback to users, and maintain the overall reliability of your Salesforce Flow. If you need more tips on handling errors, be sure to check out our guide.

Save time and automate repetitive tasks by using Bardeen. Let AI handle your workflows while you focus on more important tasks.

Troubleshooting Common Issues with Fault Connectors

While Fault Connectors are a powerful tool for handling errors in Salesforce Flows, you may encounter some common issues during implementation. Here are a few problems you might face and how to resolve them:

  1. Fault Connector not triggering:
    • Double-check that the error conditions are set correctly and match the expected error scenario.
    • Ensure that the Fault Connector is properly connected to the relevant elements in your Flow.
    • Verify that the user running the Flow has the necessary permissions to access the Fault Connector.
  2. Incorrect error message displayed:
    • Review the Fault Message configuration and ensure that it accurately reflects the error condition.
    • Check for any dynamic values in the Fault Message and confirm that they are populated correctly.
  3. Flow stuck in an infinite loop:
    • Examine the Fault Connector's path and ensure that it does not lead back to the same element causing the error.
    • Implement additional checks or conditions to prevent the Flow from repeatedly encountering the same error.
  4. Unhandled errors:
    • Identify any potential error scenarios that are not currently covered by Fault Connectors.
    • Add additional Fault Connectors to handle these specific error cases.

When troubleshooting issues with Fault Connectors, Salesforce's debugging tools can be invaluable. Use the Flow Debug Log to trace the execution of your Flow and identify the exact point at which an error occurs. The debug log will provide detailed information about the error, including any relevant error messages and the values of variables at the time of the error.

Fault Connectors

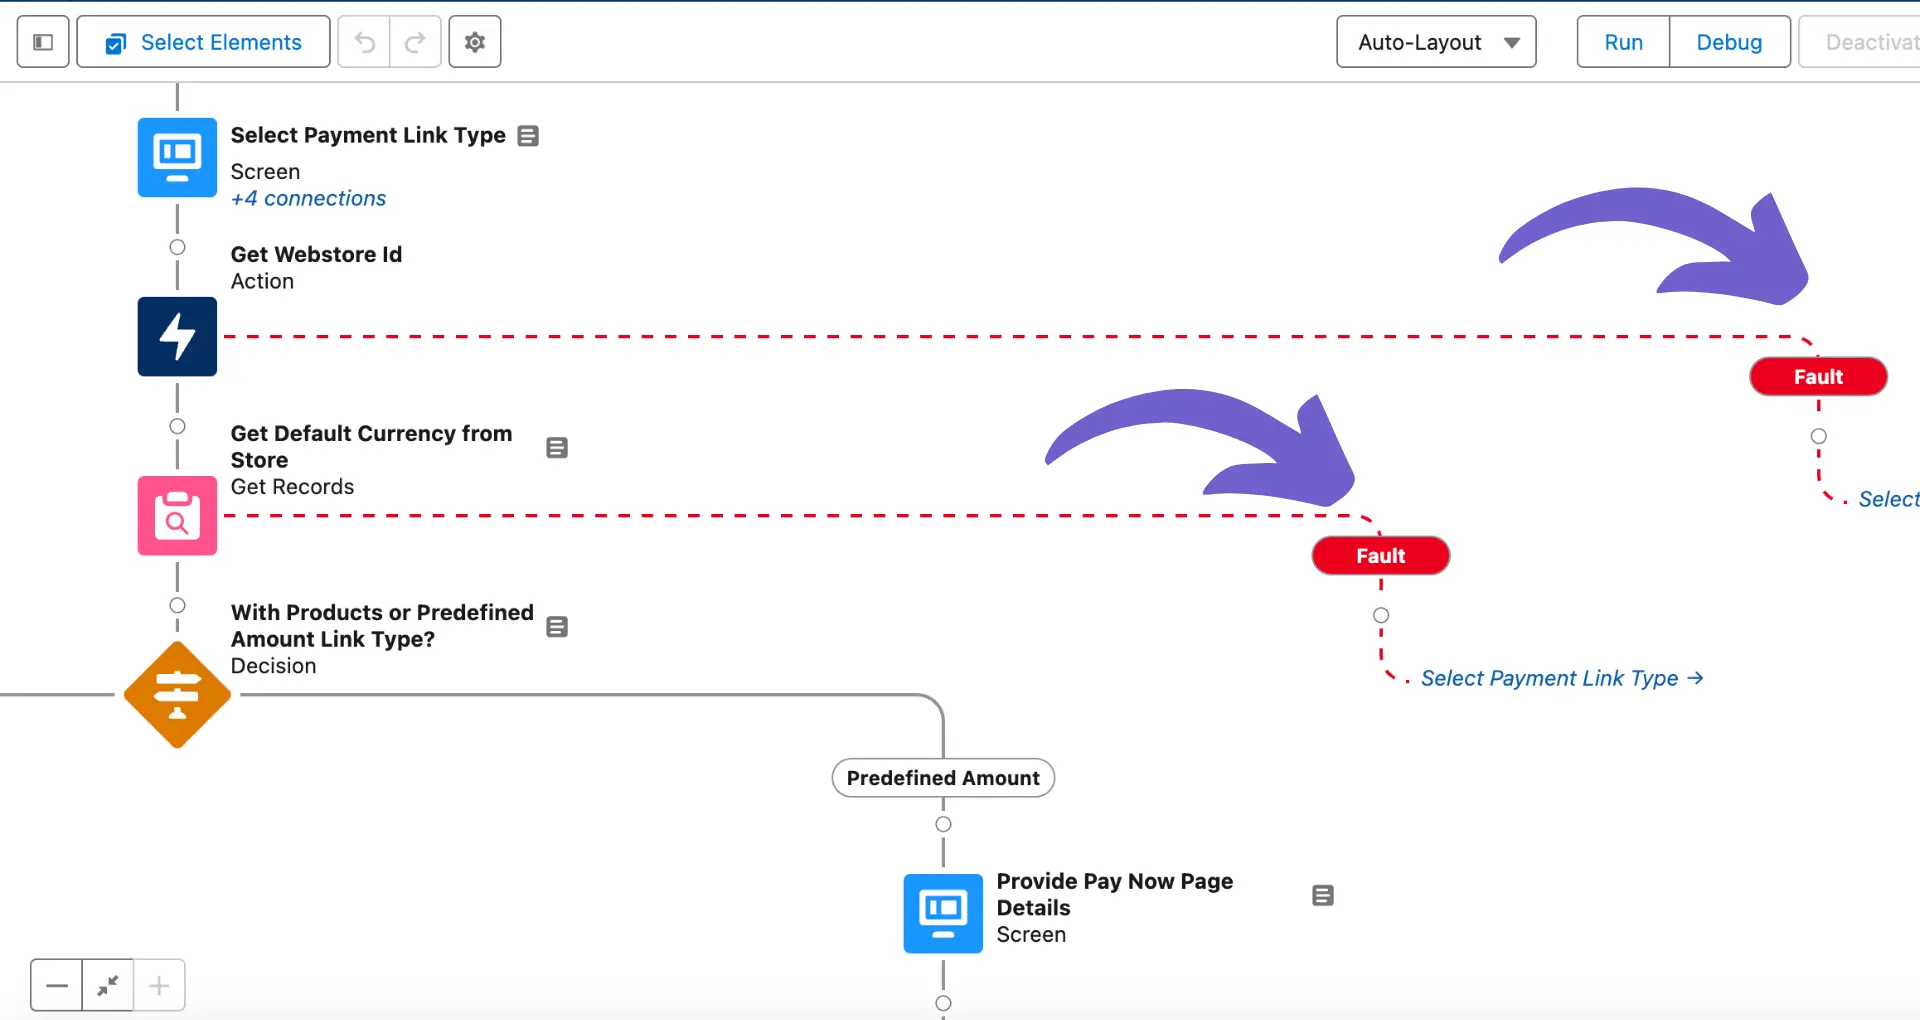
Additionally, the Flow Fault Email feature can be enabled to receive email notifications whenever a fault occurs in your Flow. These notifications include details about the error and the corresponding Fault Connector, making it easier to identify and resolve issues.

By leveraging these troubleshooting techniques and tools, you can effectively diagnose and fix common problems with Fault Connectors, ensuring that your Salesforce Flows run smoothly and handle errors gracefully. For more advanced automation, consider using sales prospecting tools to streamline your workflow.

Automate Salesforce with Bardeen: Effortless Workflows Await

While adding a fault connector in Salesforce Flow manually is a critical step for robust error handling in automation processes, leveraging Bardeen can similarly enhance your Salesforce automations. Automating Salesforce activities not only saves time but also reduces manual errors, making your workflows more efficient.

Let's explore some powerful automations you can set up with Bardeen:

  1. Create a new Salesforce contact: Automatically add new contacts to Salesforce, streamlining your contact management and ensuring your CRM is always up-to-date without manual data entry.
  2. Import Company Details into Salesforce: Effortlessly create new accounts in Salesforce with company name and domain, enhancing your sales process efficiency and lead management.
  3. Create a Salesforce contact from a LinkedIn profile: Seamlessly transfer contact information from LinkedIn profiles directly into Salesforce, optimizing your lead generation and networking strategies.

Embrace the power of automation with Bardeen to make your Salesforce workflows more productive and error-free. Start automating today by downloading the Bardeen app.

Contents
Automate Salesforce tasks with Bardeen

Bardeen's AI Agent simplifies error handling and automates tasks in Salesforce.

Get Bardeen free

Related frequently asked questions

Export Salesforce Lists to Excel: A Step-by-Step Guide

Learn how to export lists from Salesforce to Excel or CSV, including direct list view exports and using tools like Data Loader for comprehensive data analysis.

Read more
3 ways to web scrape Twitter data and tweets in 2024

Wondering how to web scrape Twitter data? Learn scraping with code (Python), without code (scraping tools), or alternative APIs. Comply with policies!

Read more
What is Robotic Process Automation? Benefits & Tools

Discover what robotic process automation (RPA) is, its benefits, key tools, and strategies for implementation. Learn how RPA can transform your business processes.

Read more
Convert Text to Date in Google Sheets: A Step-by-Step Guide

Learn how to convert text to date in Google Sheets using DATE, DATEVALUE, and TEXT functions. Accurate date recognition and formatting for analysis.

Read more
Explore SmartSuite: A Complete Work Management Solution

Discover how SmartSuite revolutionizes work management with robust project tracking, automation, and team collaboration features.

Read more
Copy Google Calendar Events: Complete 2024 Guide

Learn to copy events between Google Calendars with our comprehensive guide. Perfect for efficient scheduling and time management in 2024.

Read more
how does bardeen work?

Your proactive teammate — doing the busywork to save you time

Integrate your apps and websites

Use data and events in one app to automate another. Bardeen supports an increasing library of powerful integrations.

Perform tasks & actions

Bardeen completes tasks in apps and websites you use for work, so you don't have to - filling forms, sending messages, or even crafting detailed reports.

Combine it all to create workflows

Workflows are a series of actions triggered by you or a change in a connected app. They automate repetitive tasks you normally perform manually - saving you time.

get bardeen

Don't just connect your apps, automate them.

200,000+ users and counting use Bardeen to eliminate repetitive tasks

Effortless setup
AI powered workflows
Free to use
Reading time
Thank you! Your submission has been received!
Oops! Something went wrong while submitting the form.
By clicking “Accept”, you agree to the storing of cookies. View our Privacy Policy for more information.