Custom fields in HubSpot CRM let you store and manage unique data for contacts, companies, and deals. Adding custom fields helps tailor HubSpot to fit your business needs, improving data organization and enabling targeted marketing and sales efforts. In this step-by-step guide, we'll walk you through creating custom fields in HubSpot CRM and share best practices for naming, organizing, and using them effectively.
Understanding Custom Fields in HubSpot
Custom fields in HubSpot CRM allow you to store and manage specific data points that are unique to your business. By adding custom fields, you can tailor your CRM to capture information that goes beyond the standard contact, company, and deal properties. This customization enables you to:
Collect data that aligns with your specific business needs and processes
Segment and target your contacts, companies, and deals more effectively
Personalize your marketing and sales efforts based on custom data points
Custom fields can be used to store various types of information, such as:
Demographic data (e.g., age, gender, industry)
Behavioral data (e.g., product preferences, communication preferences)
Transactional data (e.g., purchase history, subscription level)
Engagement data (e.g., event attendance, webinar participation)
By leveraging custom fields, you can gain deeper insights into your contacts, companies, and deals, enabling you to make data enrichment decisions and deliver more targeted, personalized experiences.
Creating Custom Fields in HubSpot
To create custom fields in HubSpot, follow these steps:
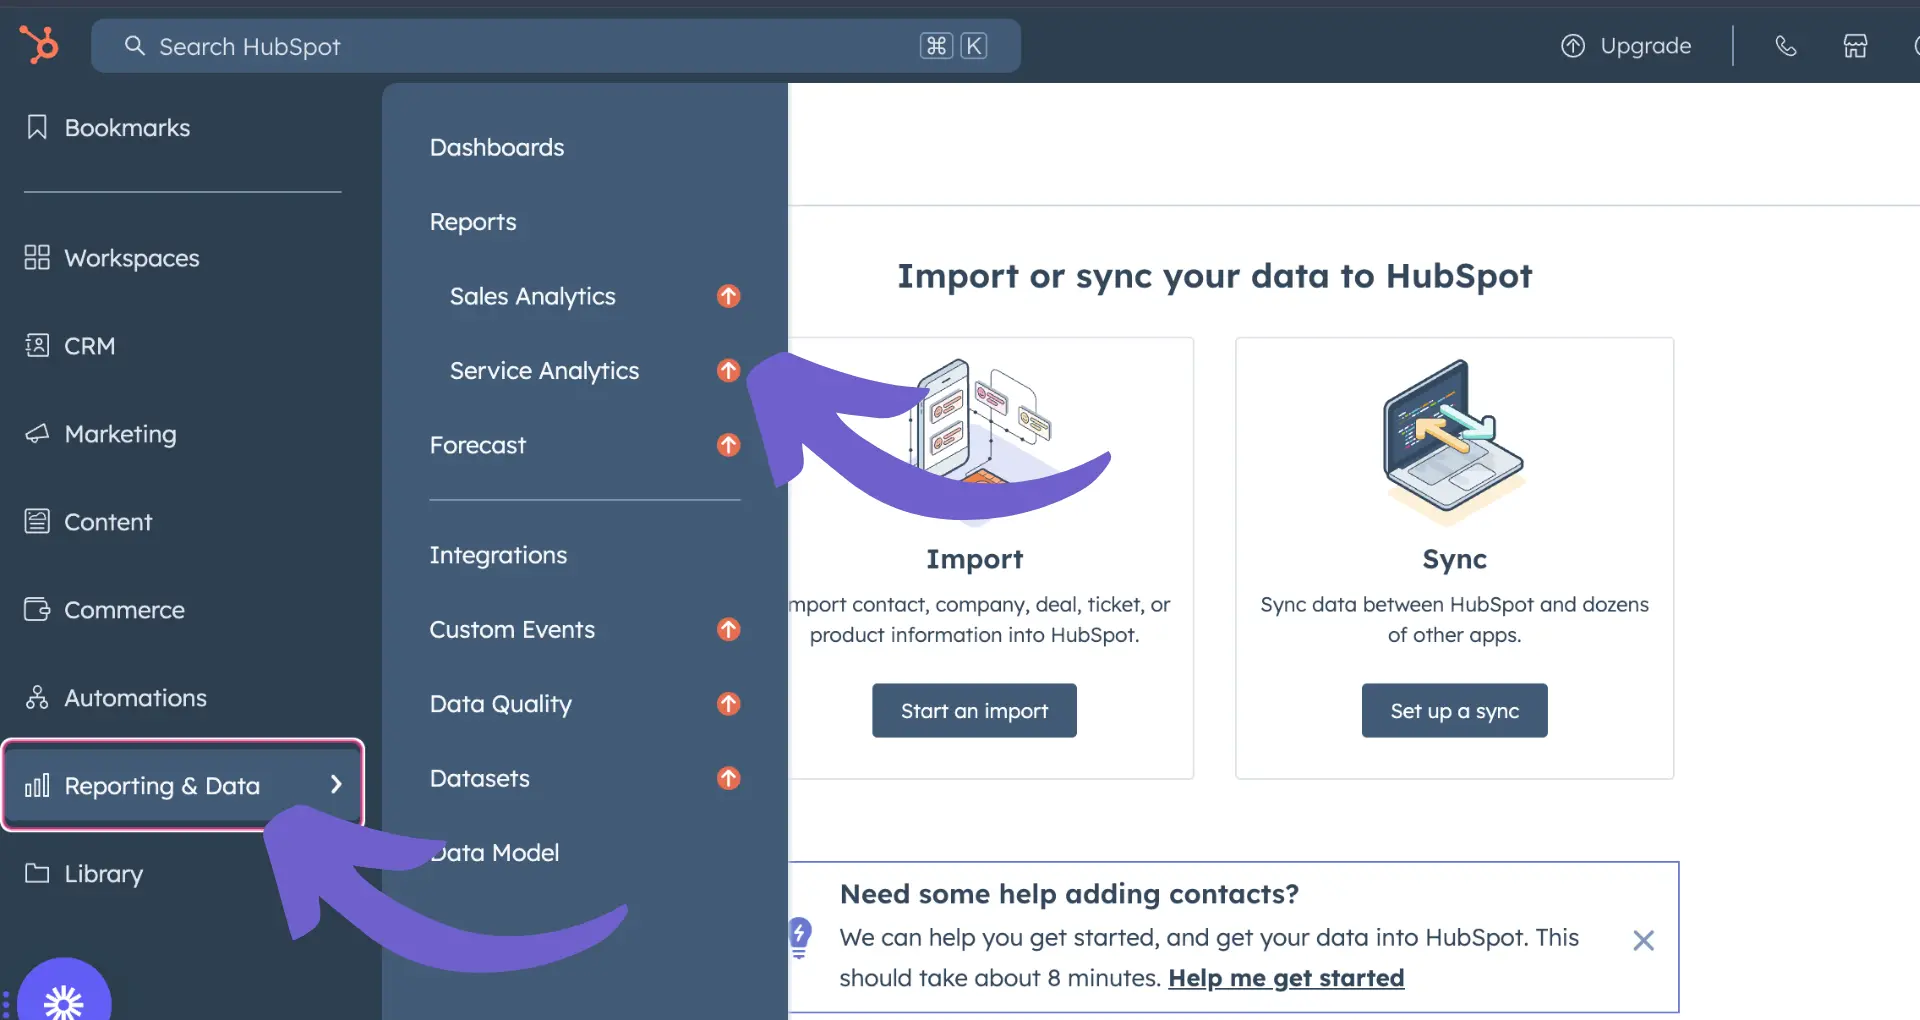
Navigate to your HubSpot account settings by clicking the settings icon in the top navigation bar.
In the left sidebar menu, click "Properties."
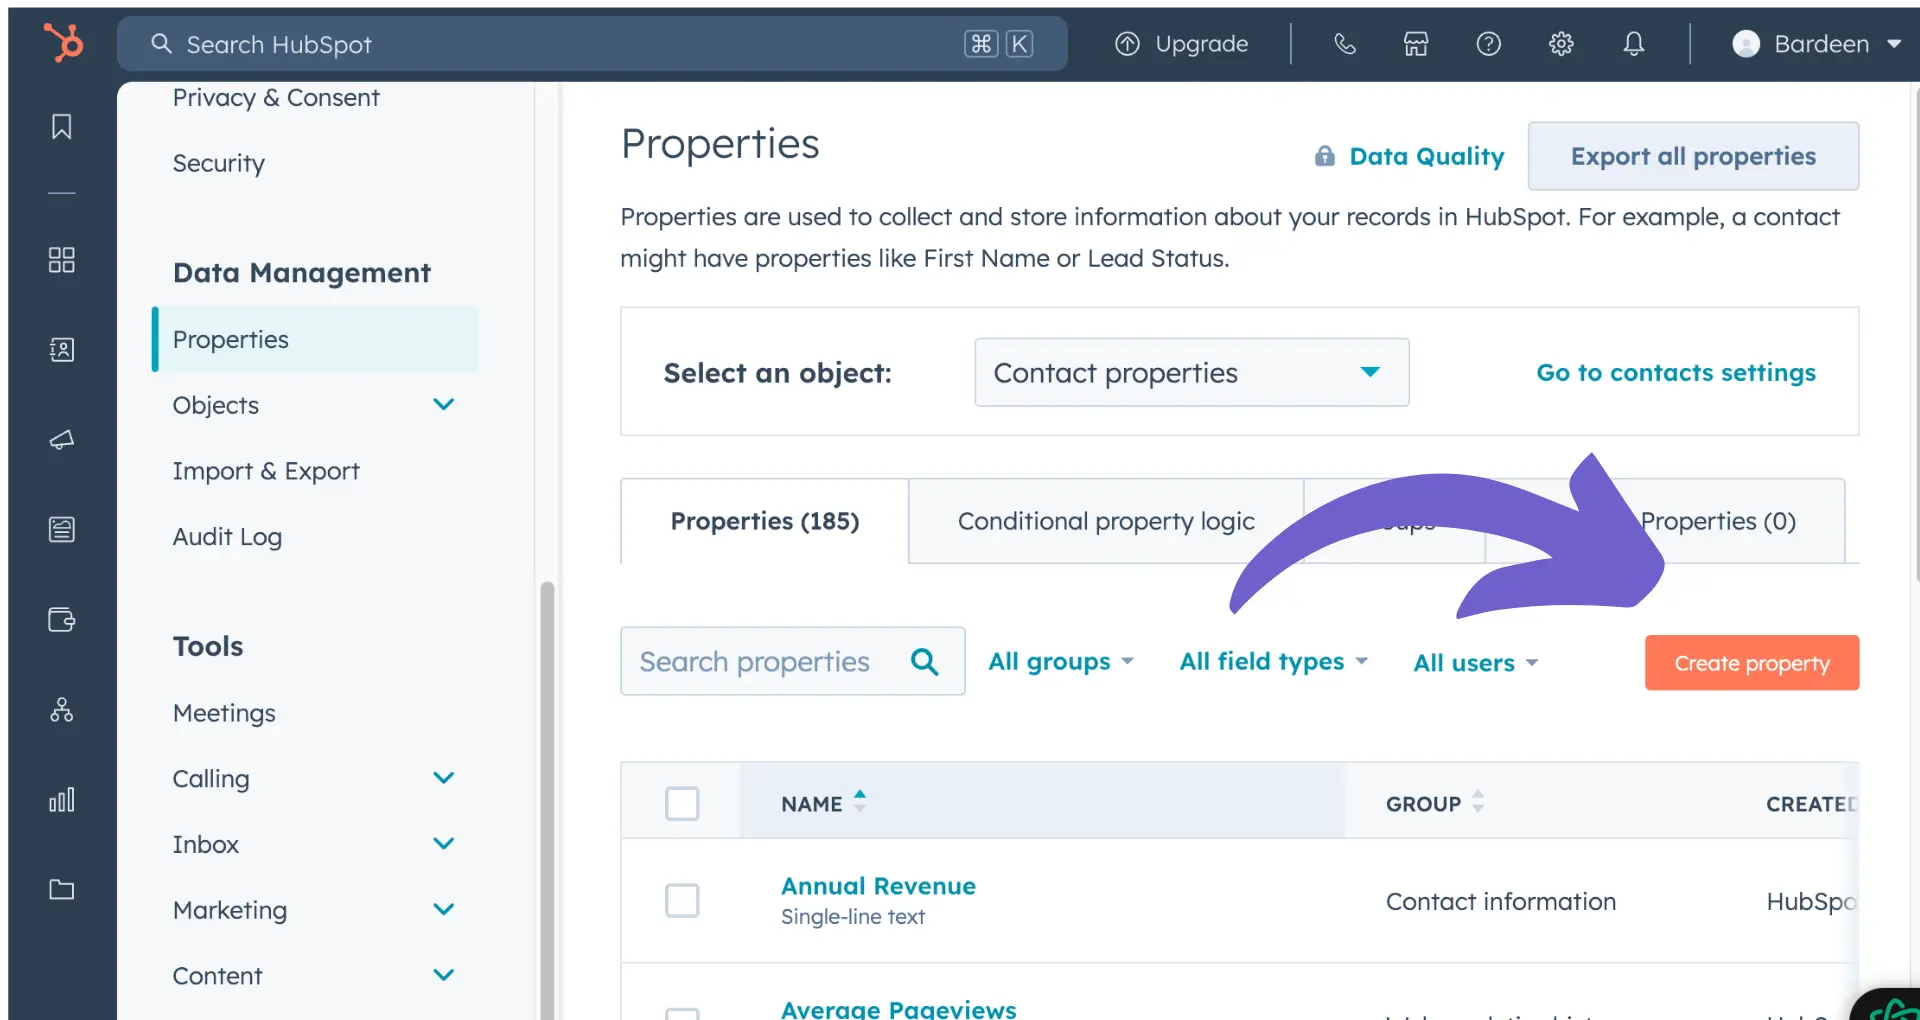
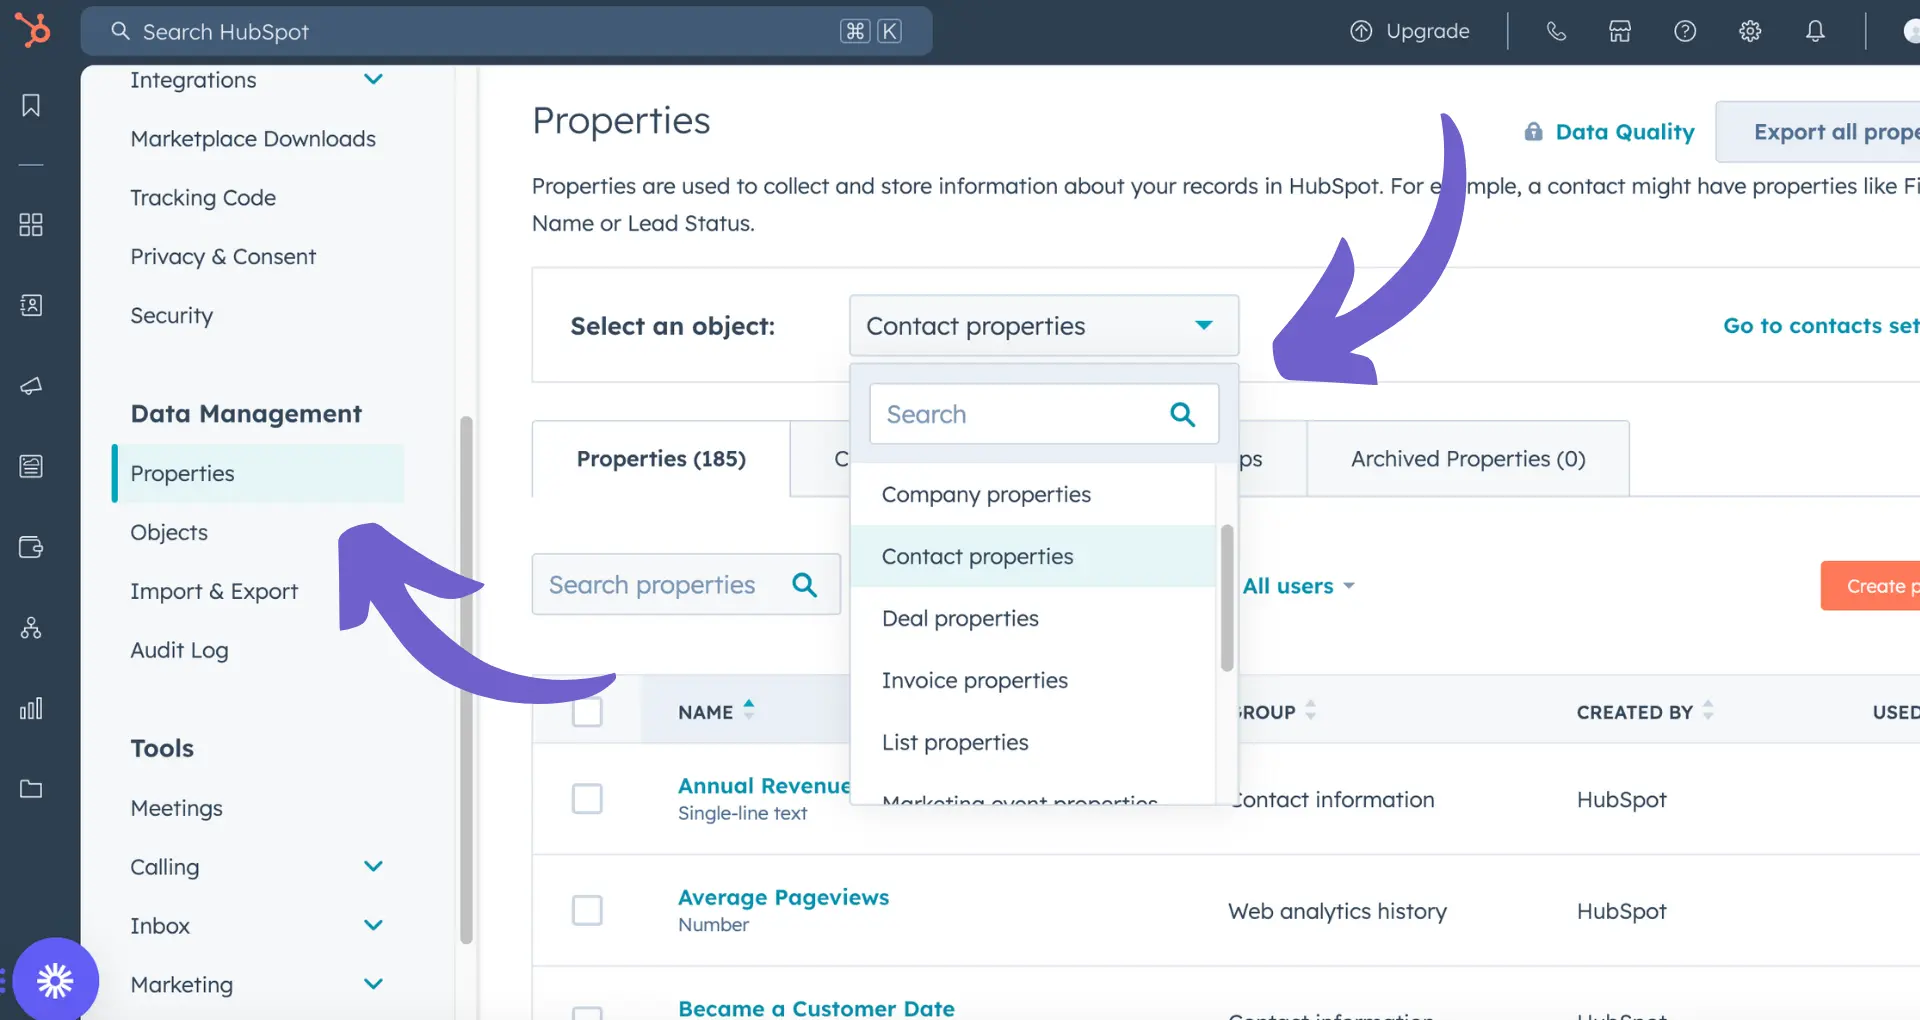
Select the object type (contacts, companies, deals) for which you want to create the custom field using the "Select an object" dropdown menu.
Click the "Create property" button in the upper right corner.
In the right panel, enter the following basic information for your custom field:
Group: Choose the property group the field will belong to.
Label: Enter a unique, descriptive name for the field.
Description (optional): Add a brief description of the field's purpose.
Click "Next" to proceed to the field type settings.
Select the appropriate field type from the dropdown menu (e.g., text, number, date, dropdown).
Depending on the field type, configure additional options such as formatting, visibility, or predefined values.
Click "Next" to set any applicable rules for the custom field, such as requiring unique values or showing the field in forms and bots.
Review your custom field settings and click "Create" to save the new field.
Select the object type (contacts, companies, deals) for which you want to create the custom field using the "Select an object" dropdown menu
Your newly created custom field will now be available for use within the selected object type in HubSpot CRM. For more tips on optimizing your sales process, check out our guide on sales prospecting tools.
Bardeen can automate your sales prospecting tasks in HubSpot. Use it to save time and focus on closing deals.
Best Practices for Naming and Organizing Custom Fields
When creating custom fields in HubSpot, it's essential to follow best practices for naming and organizing them to ensure clarity, consistency, and efficient data management. Here are some tips:
Naming Custom Fields
Use descriptive and concise names that clearly convey the purpose of the field.
Establish a consistent naming convention across your organization, such as using underscores or camel case.
Avoid using special characters or spaces in field names.
Consider including the field type in the name (e.g., "contact_email" or "company_revenue_number").
Organizing Custom Fields
Group related custom fields together into categories or sections for easier navigation and management.
Prioritize the most frequently used or important fields at the top of each category.
Use a logical hierarchy and naming structure for categories to ensure intuitive organization.
Regularly review and clean up unused or redundant custom fields to maintain a clutter-free CRM.
By following these best practices, you can create a well-structured and easily maintainable set of custom fields in HubSpot, ultimately streamlining your data management processes and improving reporting capabilities.
Utilizing Custom Fields in Marketing and Sales Automation
Custom fields play a crucial role in enhancing the effectiveness of marketing and sales automation within HubSpot. By leveraging custom fields, you can create more targeted and personalized experiences for your contacts. Here's how:
Segmenting Contacts
Use custom fields to segment your contacts based on specific criteria, such as industry, job title, or product interests.
Create dynamic lists in HubSpot that automatically update based on custom field values, ensuring your contact lists remain accurate and up-to-date.
Personalizing Content
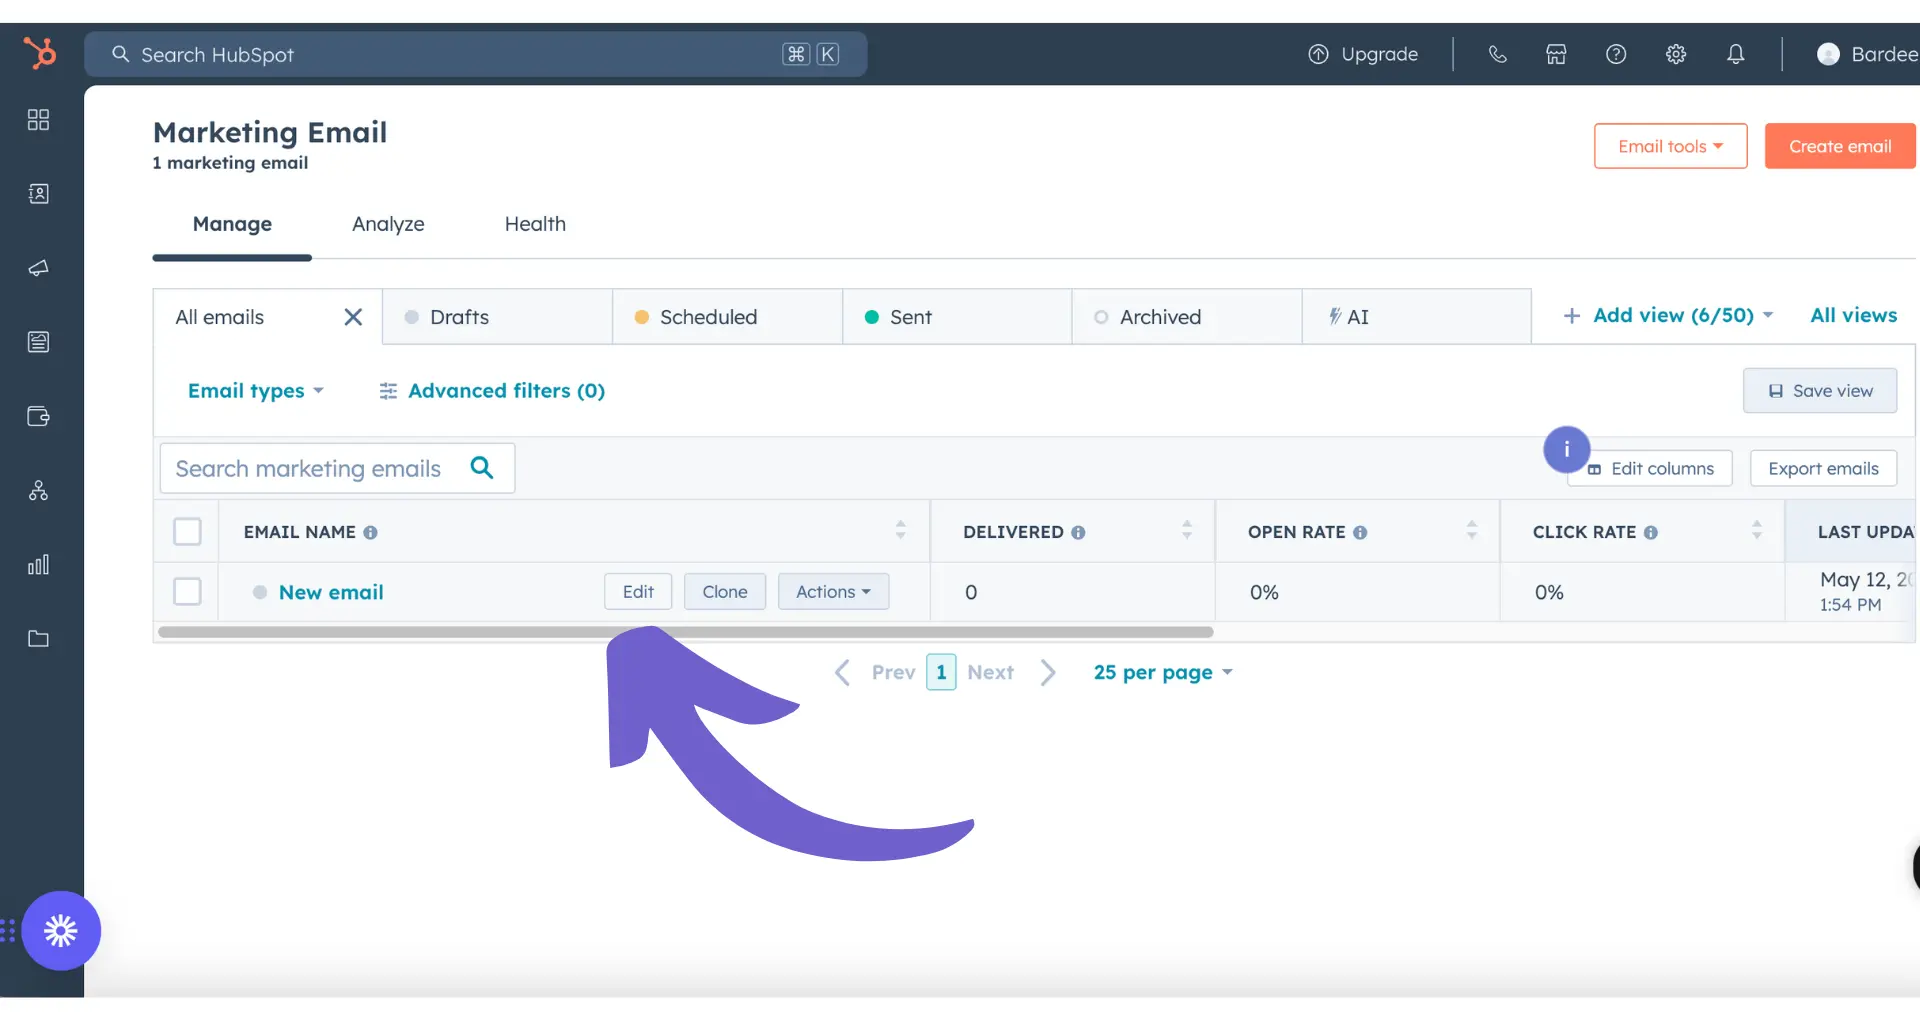
Incorporate custom fields into your email marketing campaigns to deliver personalized content tailored to each contact's preferences or characteristics.
Use custom fields to dynamically populate landing pages, forms, and CTAs, creating a more engaging and relevant experience for visitors.
Triggering Automation Workflows
Set up automation workflows in HubSpot that trigger specific actions based on changes in custom field values.
HubSpot Automation
For example, if a contact's custom field "Product Interest" changes to "Product A," an automated email series introducing Product A can be triggered.
By utilizing custom fields in your marketing and sales automation efforts, you can deliver more targeted and personalized experiences, ultimately leading to higher engagement, conversion rates, and customer satisfaction. Additionally, AI sales automation tools can further streamline your processes.
Protecting sensitive information and maintaining data integrity are crucial when working with custom fields in HubSpot. By managing access and permissions, you can control who can view and edit custom field data, ensuring that only authorized users have access to the information they need. Here's how to effectively manage access and permissions for custom fields in HubSpot:
Setting User Permissions
Navigate to the Settings menu in your HubSpot account and select Users & Teams.
Click on the user you want to manage permissions for and select Edit permissions.
Under the CRM tab, you can customize access to specific objects and activities, including custom fields.
Choose from options like View, Edit, or None to control the level of access for each user.
Utilizing Teams for Streamlined Permission Management
Create teams in HubSpot to group users with similar roles and access requirements.
Assign custom field permissions at the team level to efficiently manage access for multiple users at once.
Use the Objects their team owns and [Objects] they own permission settings to fine-tune access based on record ownership.
Regularly Auditing and Updating Permissions
As your organization evolves and team members change, it's essential to regularly review and update custom field permissions. Conduct periodic audits to ensure that users have the appropriate level of access and revoke permissions for those who no longer require them. This helps maintain the security and integrity of your data over time.
By carefully managing access and permissions for custom fields in HubSpot, you can protect sensitive information, maintain data integrity, and ensure that the right people have access to the data they need to perform their roles effectively. Learn more about lead enrichment to improve your data management.
Troubleshooting Common Issues with Custom Fields
While custom fields in HubSpot provide a powerful way to capture and organize data, users may encounter challenges when adding or using them. Here are some common issues and their solutions:
Incorrect Data Types
Ensure that the data being entered into custom fields matches the designated field type (e.g., text, number, date).
If data is imported incorrectly, consider exporting the data, correcting the formatting, and re-importing it.
Integration Errors
When using custom fields with third-party integrations, ensure that the field names and data types match between systems.
Double-check that the integration is set up correctly and that any necessary field mappings are in place.
Ensure that the appropriate teams and users have the necessary access to the custom fields they need.
Webhook Issues
If webhooks are not triggering when custom fields are updated, consider the following:
Verify that the webhook subscription is set up correctly and includes the appropriate custom field names.
Check that the external system receiving the webhook is functioning properly and can handle the incoming data.
Save time with Bardeen automations. Automate data formatting, integrations, and more with a click.
By understanding these common issues and following the provided troubleshooting steps, users can effectively resolve challenges related to custom fields in HubSpot. If the issue persists, reaching out to HubSpot support or consulting the HubSpot Community can provide further guidance and solutions.