Are you tired of constantly sifting through a cluttered inbox, trying to find important emails amidst a sea of spam and irrelevant messages? Mastering the art of automatically filtering emails in Gmail can be a game-changer, saving you valuable time and ensuring that you never miss a crucial email again. In this comprehensive, step-by-step guide, we'll walk you through the process of setting up and managing Gmail filters, both manually and using the innovative automation tool, Bardeen.
By the end of this guide, you'll have a clear understanding of how to create basic and advanced filters, automate your email management, and maintain a clutter-free inbox. Get ready to take control of your Gmail inbox and boost your productivity in 2024 and beyond!
Gmail filters are a powerful tool that can help you manage your email flow more efficiently. By setting up filters, you can automatically categorize, label, and archive emails based on specific criteria, keeping your inbox organized and clutter-free. For example, if you regularly receive newsletters from a particular sender, you can create a filter that automatically labels and archives these emails, ensuring they don't clutter your primary inbox.
Gmail filters are designed to streamline your email management process by automatically sorting and organizing incoming messages based on predefined criteria. These criteria can include the sender's email address, specific keywords in the subject line or body of the email, or even the presence of attachments. By leveraging filters, you can ensure that important emails are prioritized, while less crucial messages are neatly categorized and stored for later review.
Imagine you're working on a project with a team, and you need to keep all project-related emails separate from your regular correspondence. By setting up a filter that looks for specific keywords or the project manager's email address, you can automatically label and categorize these emails, making it easy to find and reference them when needed. This not only saves you time but also reduces the risk of important project-related messages getting lost in your inbox.
One of the most significant benefits of using Gmail filters is the ability to automatically categorize, label, and archive emails. This means that you can create a system that sorts your incoming messages into predefined categories, applies relevant labels, and even removes them from your primary inbox, all without any manual intervention.
For instance, let's say you subscribe to multiple industry newsletters. By setting up filters for each newsletter, you can ensure that they are automatically labeled and archived, keeping your primary inbox free of clutter. This not only helps you maintain a more organized inbox but also allows you to easily access these newsletters when you have the time to read them, without them constantly vying for your attention.
Moreover, by automatically archiving certain emails, you can keep your inbox focused on high-priority messages, while still retaining the ability to search for and access archived emails when needed. This approach helps you stay on top of your email management without feeling overwhelmed by the constant influx of messages.
In summary, Gmail filters are a powerful tool that can help you manage your email flow more efficiently by automatically categorizing, labeling, and archiving messages based on predefined criteria. By leveraging filters, you can keep your inbox organized, prioritize important emails, and reduce the risk of crucial messages getting lost in the clutter.
Use Bardeen to save more time. Automate your Gmail filters and focus on important tasks.
Now that you understand the importance of Gmail filters, let's dive into the next section of this guide, where you'll learn the basics of setting up filters and discover how to create a more organized and manageable inbox.
Setting up basic filters in Gmail is a straightforward process that can be done directly through the search bar. By using specific criteria such as the sender's email address, subject line keywords, or even the presence of attachments, you can quickly create filters that automatically sort, label, or archive incoming messages. This not only saves you time but also ensures that important emails are never missed, and your inbox remains organized.
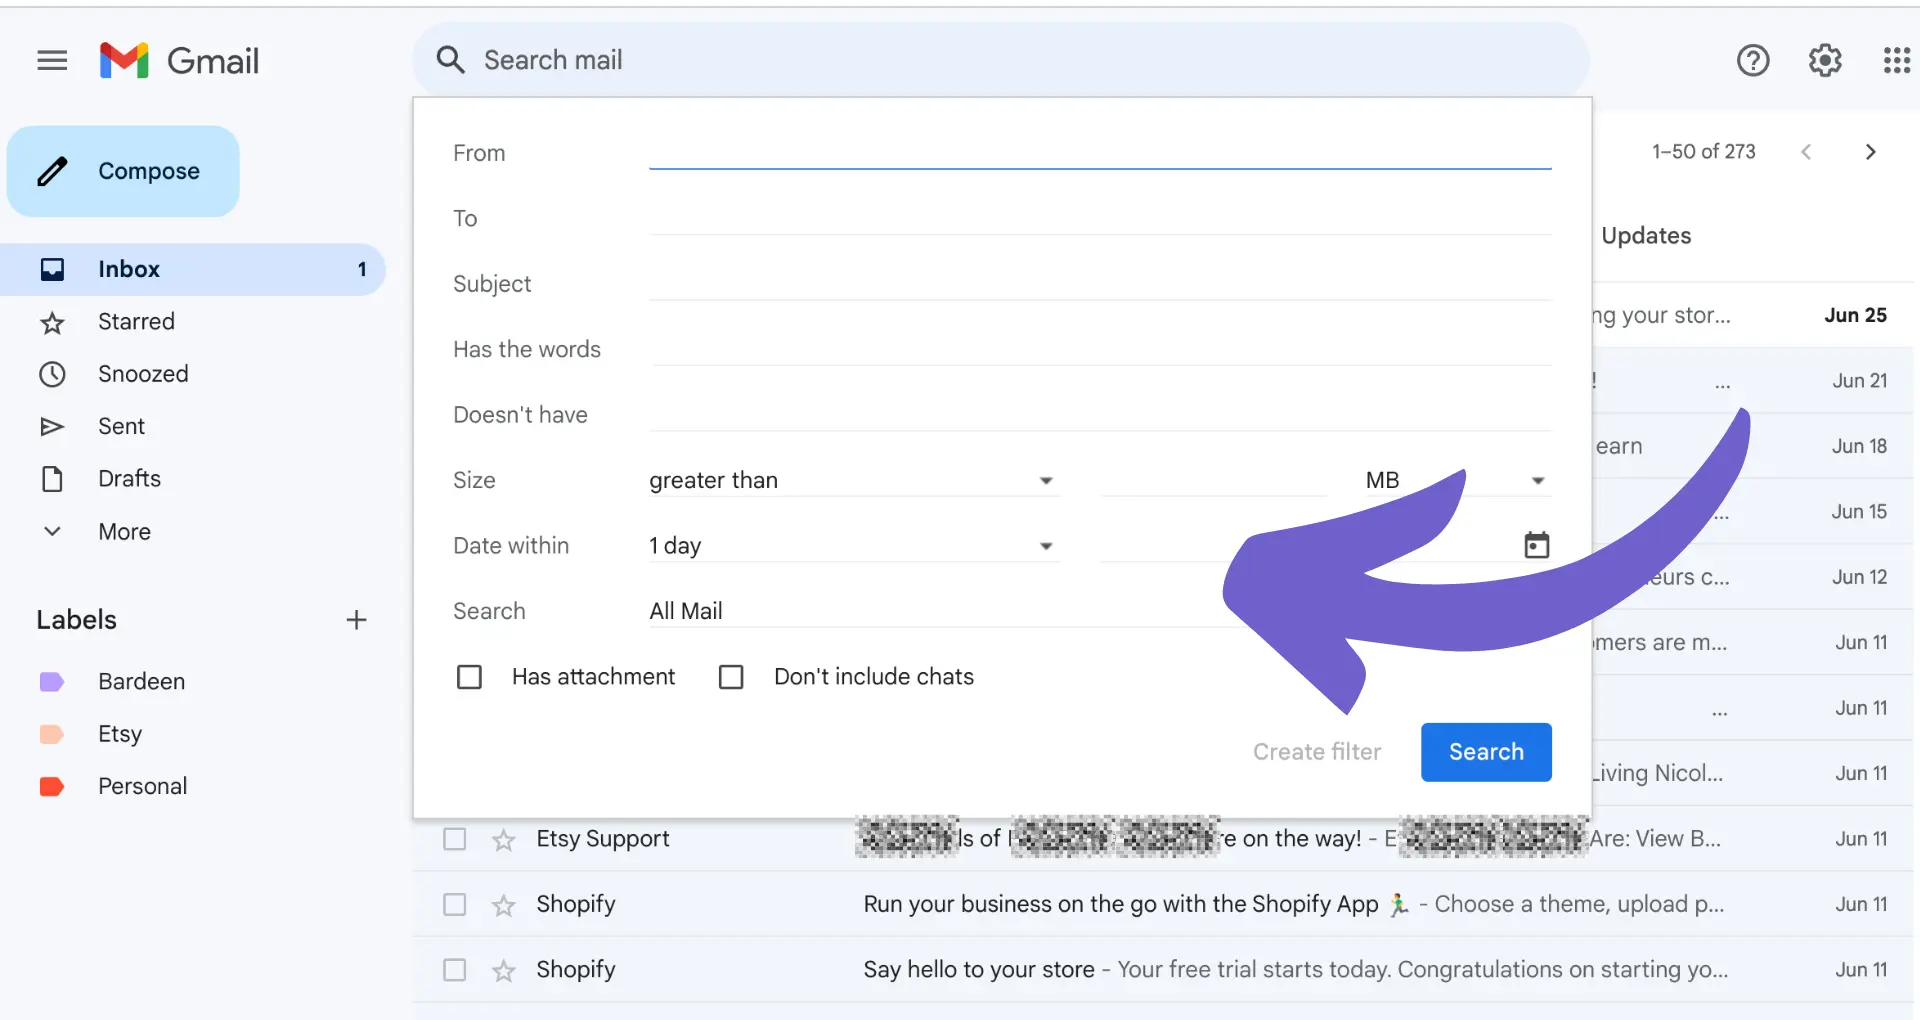
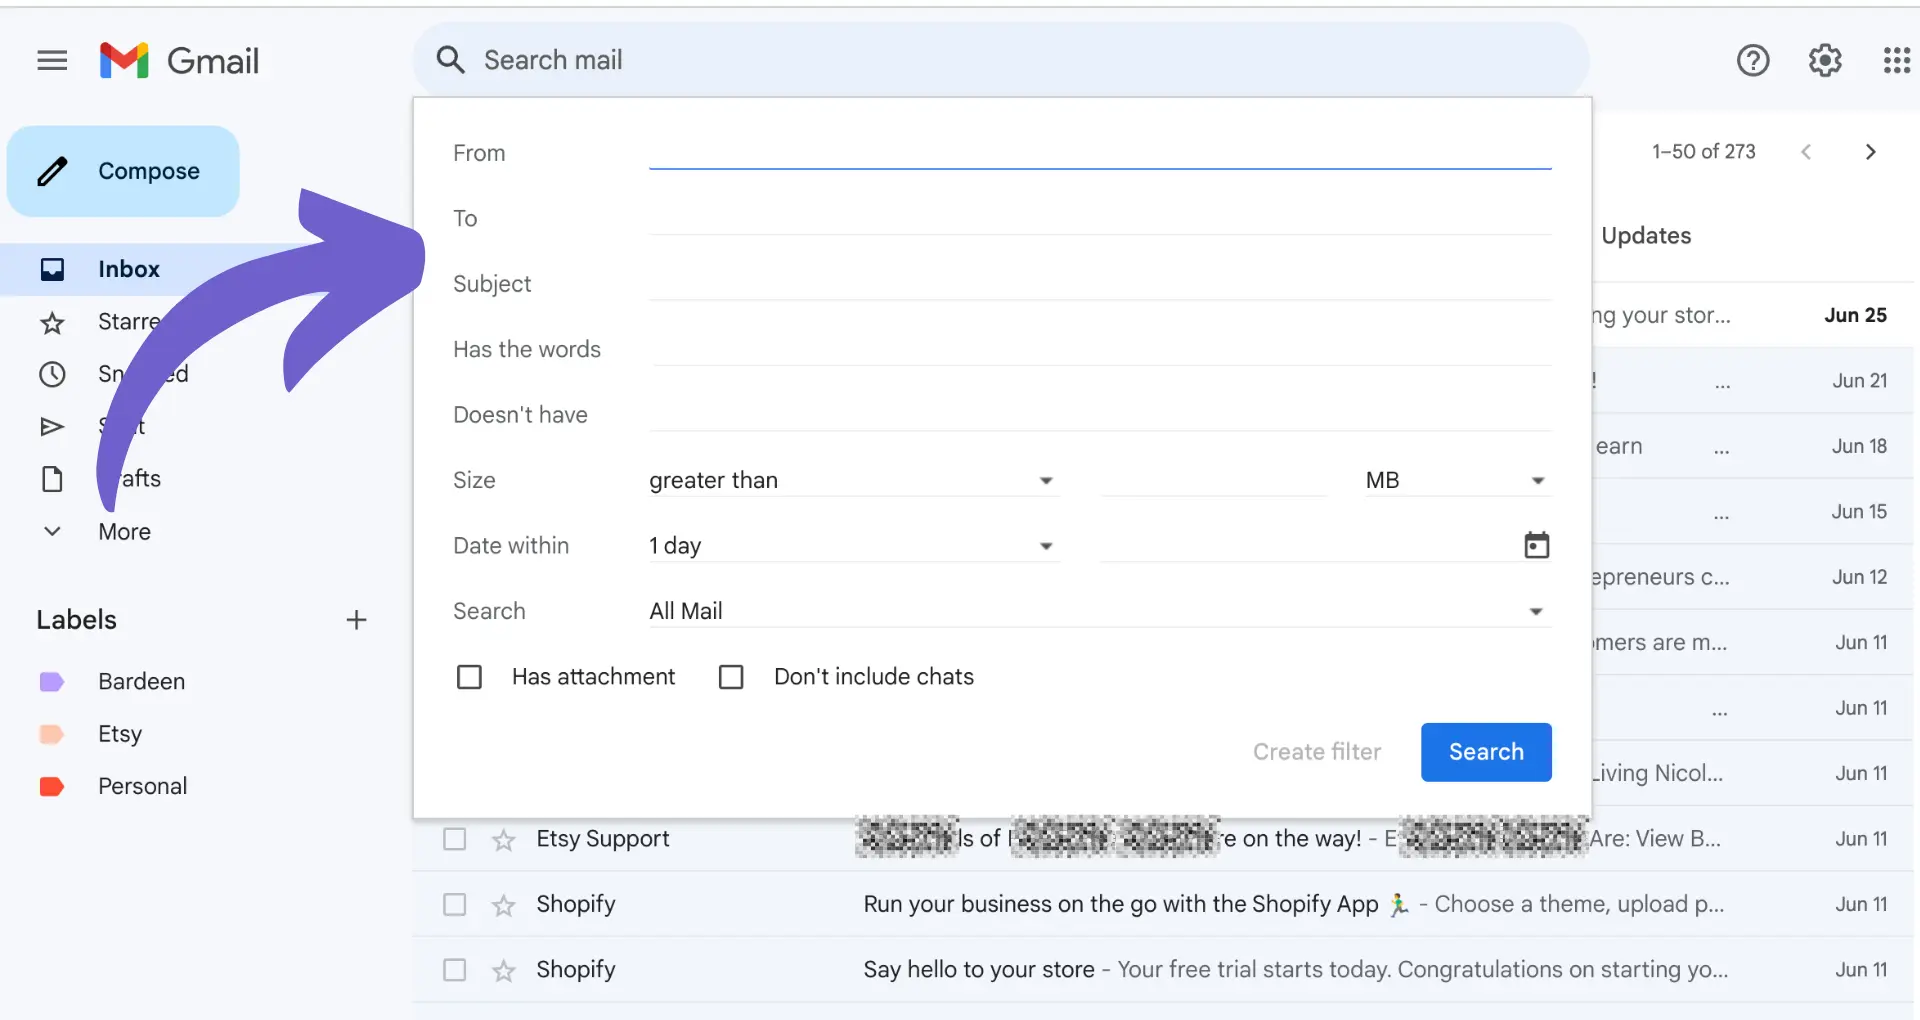
To create a basic filter in Gmail, start by clicking on the down arrow in the search bar to reveal the advanced search options. Here, you can enter your desired criteria, such as the sender's email address, specific words in the subject line, or keywords within the email body. For example, if you want to filter all emails from a particular client, simply enter their email address in the "From" field.
Once you've entered your search criteria, click on the "Search" button to see which emails match your filter. If you're satisfied with the results, click on the "Create filter" button at the bottom of the search window. This will bring up a new dialog box where you can choose what actions you want the filter to perform, such as applying a label, archiving the message, or even forwarding it to another email address.
After selecting your desired actions, click on the "Create filter" button to save your new filter. From now on, any incoming emails that match your specified criteria will automatically be sorted according to your chosen actions, keeping your inbox organized and clutter-free.
Before applying a new filter to your entire inbox, it's crucial to test it to ensure it works as intended. This is especially important if you've created a complex filter with multiple criteria, as there may be unintended consequences or overlooked scenarios.
To test a filter, simply create it as described above, but before clicking on the "Create filter" button, select the "Also apply filter to matching conversations" checkbox. This will apply the filter to any existing emails in your inbox that match your specified criteria, allowing you to see how the filter will behave in real-world situations.
If you notice any issues or unintended results during testing, simply modify your filter criteria or actions accordingly. Once you're confident that the filter is working as expected, you can apply it to all future incoming messages by leaving the "Also apply filter to matching conversations" checkbox unchecked when creating the filter.
In this section, you've learned how to create basic filters in Gmail using the search bar and specific criteria like sender, subject, and keywords. You've also discovered the importance of testing filters before applying them broadly to ensure they work as intended.
Now that you've mastered the basics of Gmail filters, let's move on to the next section of this guide, where you'll explore advanced filtering techniques that can take your email management skills to the next level.
While basic filters are great for simple email management, advanced filtering techniques can take your productivity to the next level. By using more complex criteria such as email size, attachments, or specific date ranges, you can create highly targeted filters that help you manage your inbox more efficiently. Additionally, incorporating wildcard characters and Boolean operators allows for even greater precision in your filtering rules.
One advanced filtering technique is to sort emails based on their size. This can be particularly useful if you're trying to identify emails with large attachments that may be consuming valuable storage space. To filter emails by size, simply enter the desired size range in the search bar using the "size:" operator followed by the number of bytes.
Another helpful criteria is filtering emails based on the presence or absence of attachments. This can be done by using the "has:attachment" or "has:no-attachment" operators in the search bar. For example, if you want to find all emails with PDF attachments, you could enter "has:attachment filename:pdf" in the search bar.
Filtering emails by date range is also possible using the "before:" and "after:" operators followed by a specific date. This can be handy for finding emails related to a particular project or event that occurred within a specific timeframe.
Wildcard characters, such as the asterisk (*), can be used to represent one or more characters in a search query. For example, searching for "project*" will return emails containing words like "project," "projects," and "projection." This can be particularly useful when searching for emails related to a specific topic or theme.
Boolean operators, such as "AND," "OR," and "NOT," allow you to combine multiple search criteria for even more precise filtering. For instance, if you want to find emails from a specific sender that also contain a particular keyword, you could use the following search query: "from:sender@example.com AND keyword."
By combining these advanced filtering techniques, you can create highly specific filters that automatically sort, label, and organize your emails based on your unique needs and preferences. For example, you could create a filter that applies a "High Priority" label to emails from your boss that contain the word "urgent" in the subject line and have attachments larger than 2MB.
In this section, you've learned about advanced filtering techniques that can help you manage your email more efficiently. By using complex criteria like email size, attachments, and date ranges, as well as wildcard characters and Boolean operators, you can create highly targeted filters tailored to your specific needs.
Now that you've mastered both basic and advanced filtering techniques, let's explore how you can use these filters to automate your email management and boost your productivity even further.
Save more time and boost your productivity by using Bardeen to automate your Gmail filters and focus on important tasks.
Now that you've mastered the art of creating basic and advanced filters, it's time to put them to work by automating your email management. Gmail filters can be used to automatically forward emails, apply labels, and even skip the inbox for less important messages. By setting up these automated workflows, you can significantly boost your productivity and spend less time manually sorting through your inbox.
One of the most useful automation techniques is to set up filters that automatically forward certain emails to other accounts or apply specific labels. For example, if you regularly receive emails from a particular client or project, you can create a filter that applies a corresponding label and forwards the email to a team member responsible for that account.
To set up an automatic forwarding filter, simply create a new filter based on the desired criteria (e.g., from:client@example.com) and select the "Forward it to" option, entering the appropriate email address. You can also choose to apply a label to these emails, making it easier to find and reference them later.
Not every email requires your immediate attention. By creating filters that automatically skip the inbox for less important emails, you can reduce clutter and focus on higher-priority messages. This is particularly useful for newsletters, promotional emails, or automated notifications that don't require action on your part.
To set up a filter that skips the inbox, create a new filter based on the desired criteria and select the "Skip the Inbox (Archive it)" option. This will ensure that matching emails are automatically archived without ever appearing in your main inbox.
By combining multiple filters and automation techniques, you can create sophisticated workflows tailored to your specific needs. For instance, if you manage multiple projects or clients, you can set up filters that automatically sort, label, and forward emails based on project-specific criteria.
Let's say you have a client named Acme Corp, and you want to ensure that all emails related to this client are properly organized and shared with your team. You could create a filter that looks for emails from "@acmecorp.com" and automatically applies an "Acme Corp" label, forwards the email to your team's shared inbox, and marks it as important. This way, everyone stays informed, and no critical communications slip through the cracks.
By automating your email management with Gmail filters, you can save countless hours that would otherwise be spent manually sorting and organizing your inbox. These automated workflows not only boost your productivity but also ensure that important emails are never overlooked and that your team remains coordinated and informed.
In this section, we've explored how Gmail filters can be used to automate email management, from automatically forwarding and labeling emails to creating custom workflows for specific projects or clients. By implementing these techniques, you'll be well on your way to a more organized and efficient inbox.
Next up, we'll dive into the essential steps for maintaining and troubleshooting your Gmail filters to ensure they continue working smoothly and effectively over time.
As your email habits and workflow evolve over time, it's essential to regularly review and update your Gmail filters to ensure they remain effective and relevant. By staying on top of your filters and troubleshooting any issues that arise, you can maintain a clutter-free inbox and optimize your email management system.
Just as your work and personal life change over time, so do your email patterns and priorities. To keep your Gmail filters working effectively, it's important to review them periodically and make adjustments as needed.
For example, if you've recently changed roles at work or taken on new projects, you may need to create new filters to automatically label and sort emails related to these new responsibilities. Similarly, if you find that certain filters are no longer necessary or are not working as intended, it's a good idea to modify or delete them to keep your inbox organized.
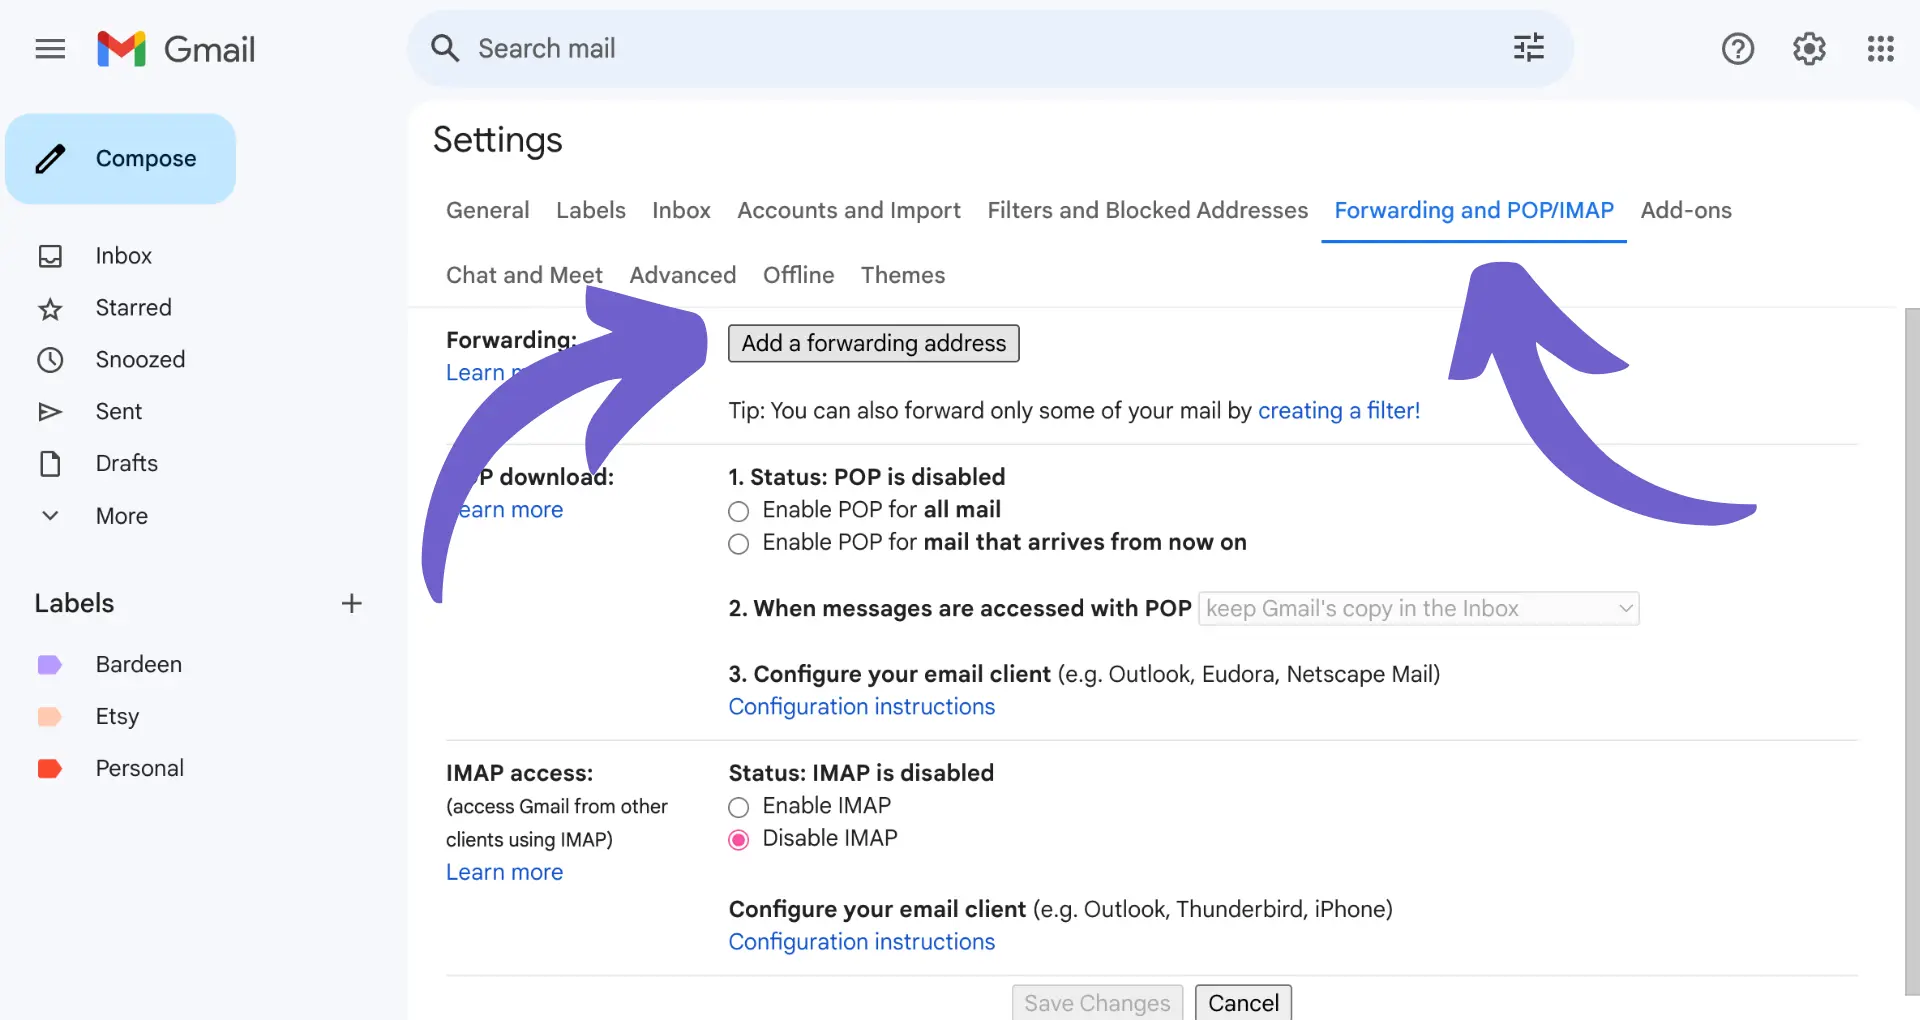
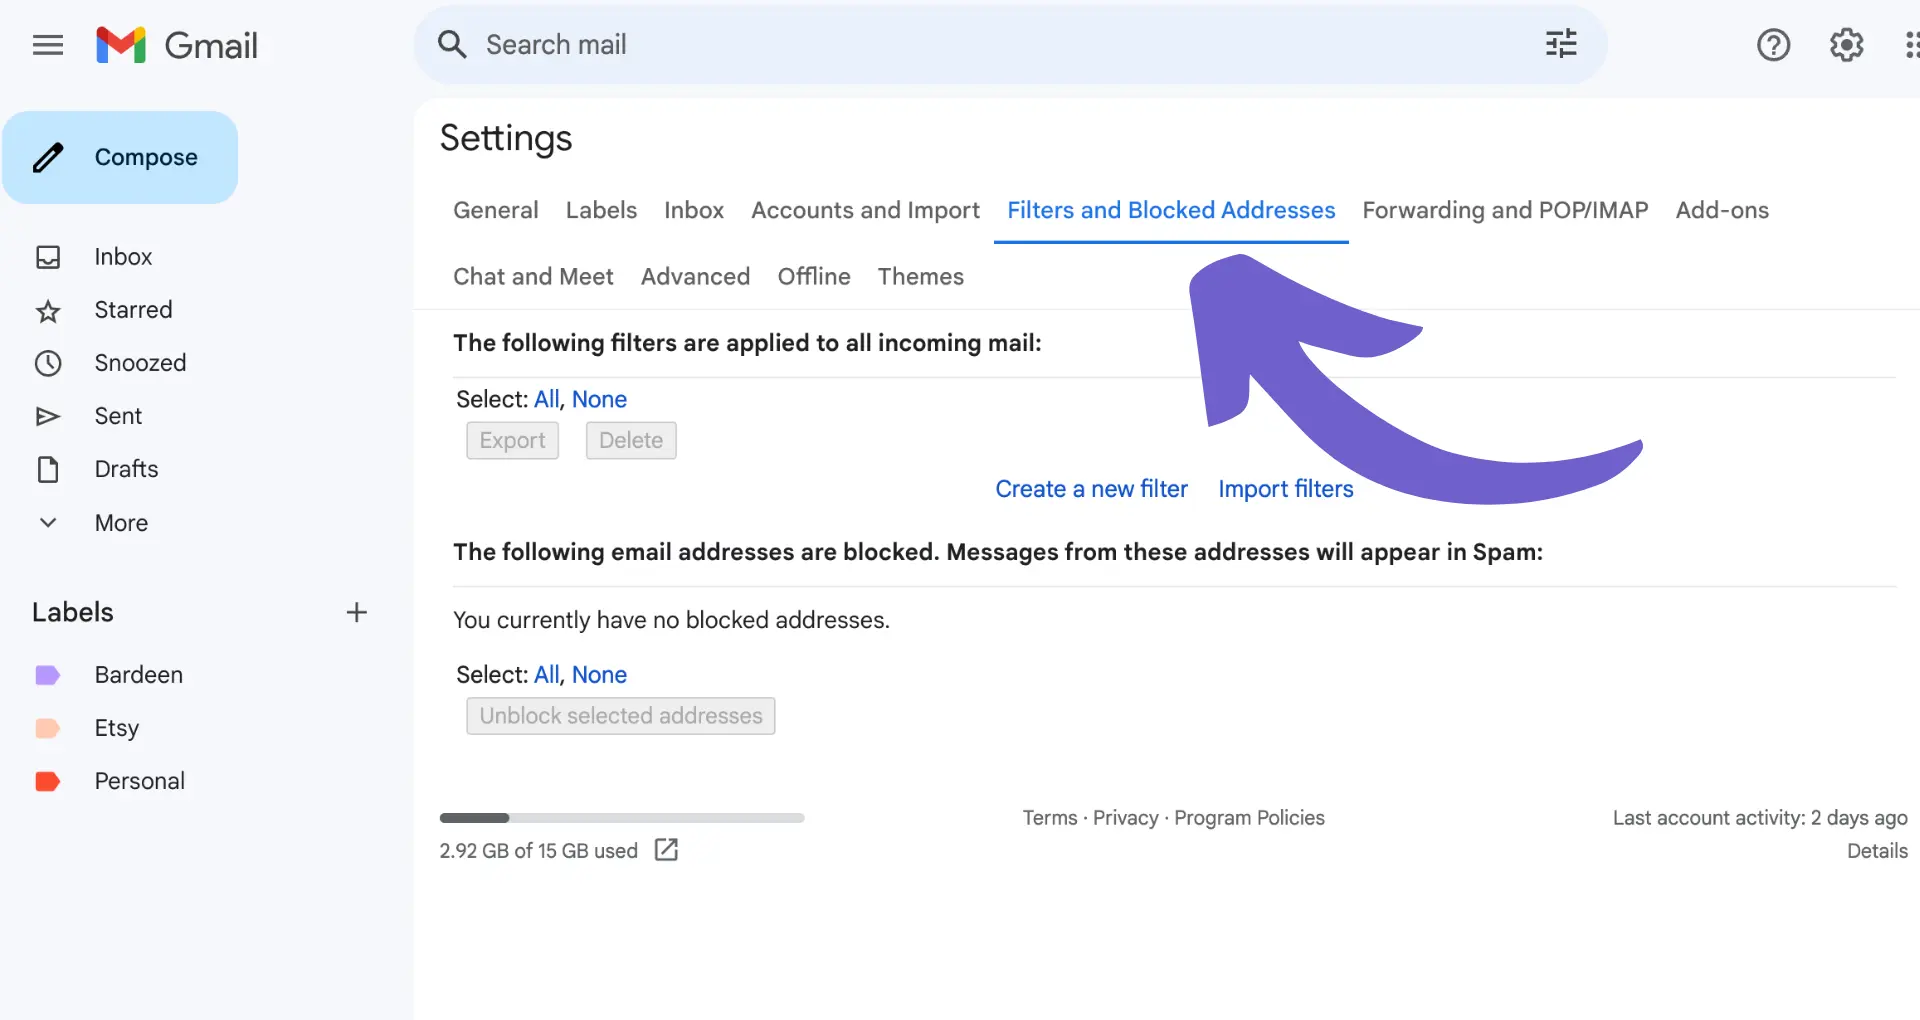
To review your existing filters, go to your Gmail settings and click on the "Filters and Blocked Addresses" tab. From there, you can edit, delete, or create new filters as needed. It's a good practice to do this at least once every few months or whenever you notice a significant change in your email patterns.
Despite your best efforts, there may be times when your Gmail filters don't work as expected. Here are a few common issues and how to troubleshoot them:
If you encounter a filter issue that you can't resolve on your own, don't hesitate to reach out to Google's support resources or consult the Gmail Help Center for additional guidance.
By regularly reviewing and updating your Gmail filters and promptly troubleshooting any issues that arise, you can ensure that your email management system remains effective and efficient over time. With a well-maintained set of filters, you'll be able to keep your inbox organized and focus on important emails.
Save more time with Bardeen. Automate your Gmail filters and concentrate on the tasks that matter.
Knowing how to automatically filter emails in Gmail is crucial for maintaining a clutter-free and organized inbox.
In this guide, you discovered:
With these techniques, you'll be a Gmail filtering pro in no time! Happy organizing, and may your inbox never be cluttered again!


SOC 2 Type II, GDPR and CASA Tier 2 and 3 certified — so you can automate with confidence at any scale.


