Uploading files in Salesforce is a critical task for managing documents, collaborating with team members, and keeping records up-to-date. Whether you're a Salesforce administrator, developer, or end-user, understanding the various methods and best practices for file uploads can significantly improve your productivity and efficiency. In this step-by-step guide, we'll explore the essentials of Salesforce file management, from basic uploads through the user interface to advanced techniques like bulk uploads, custom components, and API integrations.
Understanding Salesforce File Upload Essentials
Before diving into the various methods of uploading files in Salesforce, it's crucial to understand the basics. Salesforce supports a wide range of file types, including documents, images, videos, and audio files. However, there are size limits and specific formats that you need to keep in mind:
Organizing your files in Salesforce is essential for easy access and reference. By properly categorizing and naming your files, you can save time and ensure that your team can quickly locate the documents they need. Consider creating a consistent naming convention and using folders to structure your files logically. To further streamline your file management, you can integrate Google Drive with Salesforce.
Using the Salesforce User Interface for File Uploads
Salesforce provides a user-friendly interface for uploading files directly through the platform. Here's how you can upload files using the Salesforce UI:
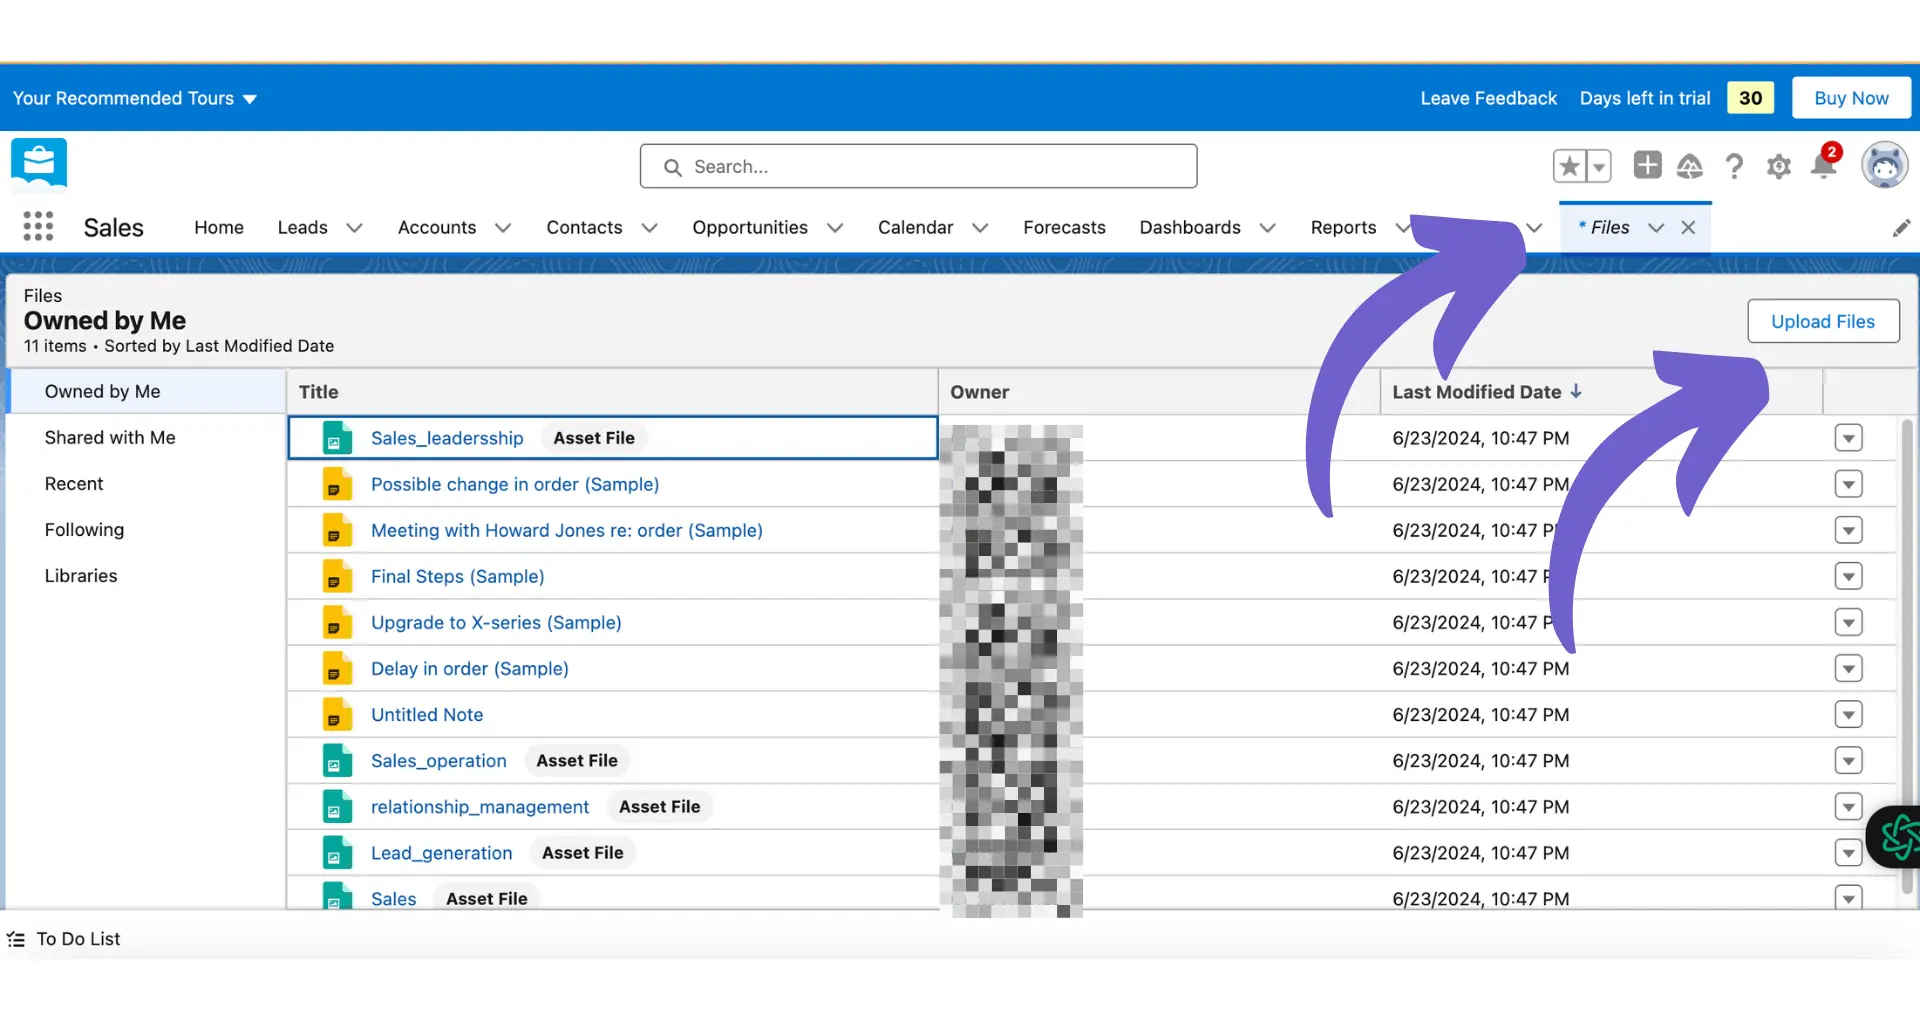
Navigate to the 'Files' tab in Salesforce.
Click on the 'Upload Files' button.
Select the file(s) you want to upload from your local machine.
Choose the location where you want to store the file(s) in Salesforce, such as a specific library or folder.
Click 'Upload' to start the file upload process.
Navigate to the 'Files' tab in Salesforce. Click on the 'Upload Files' button.
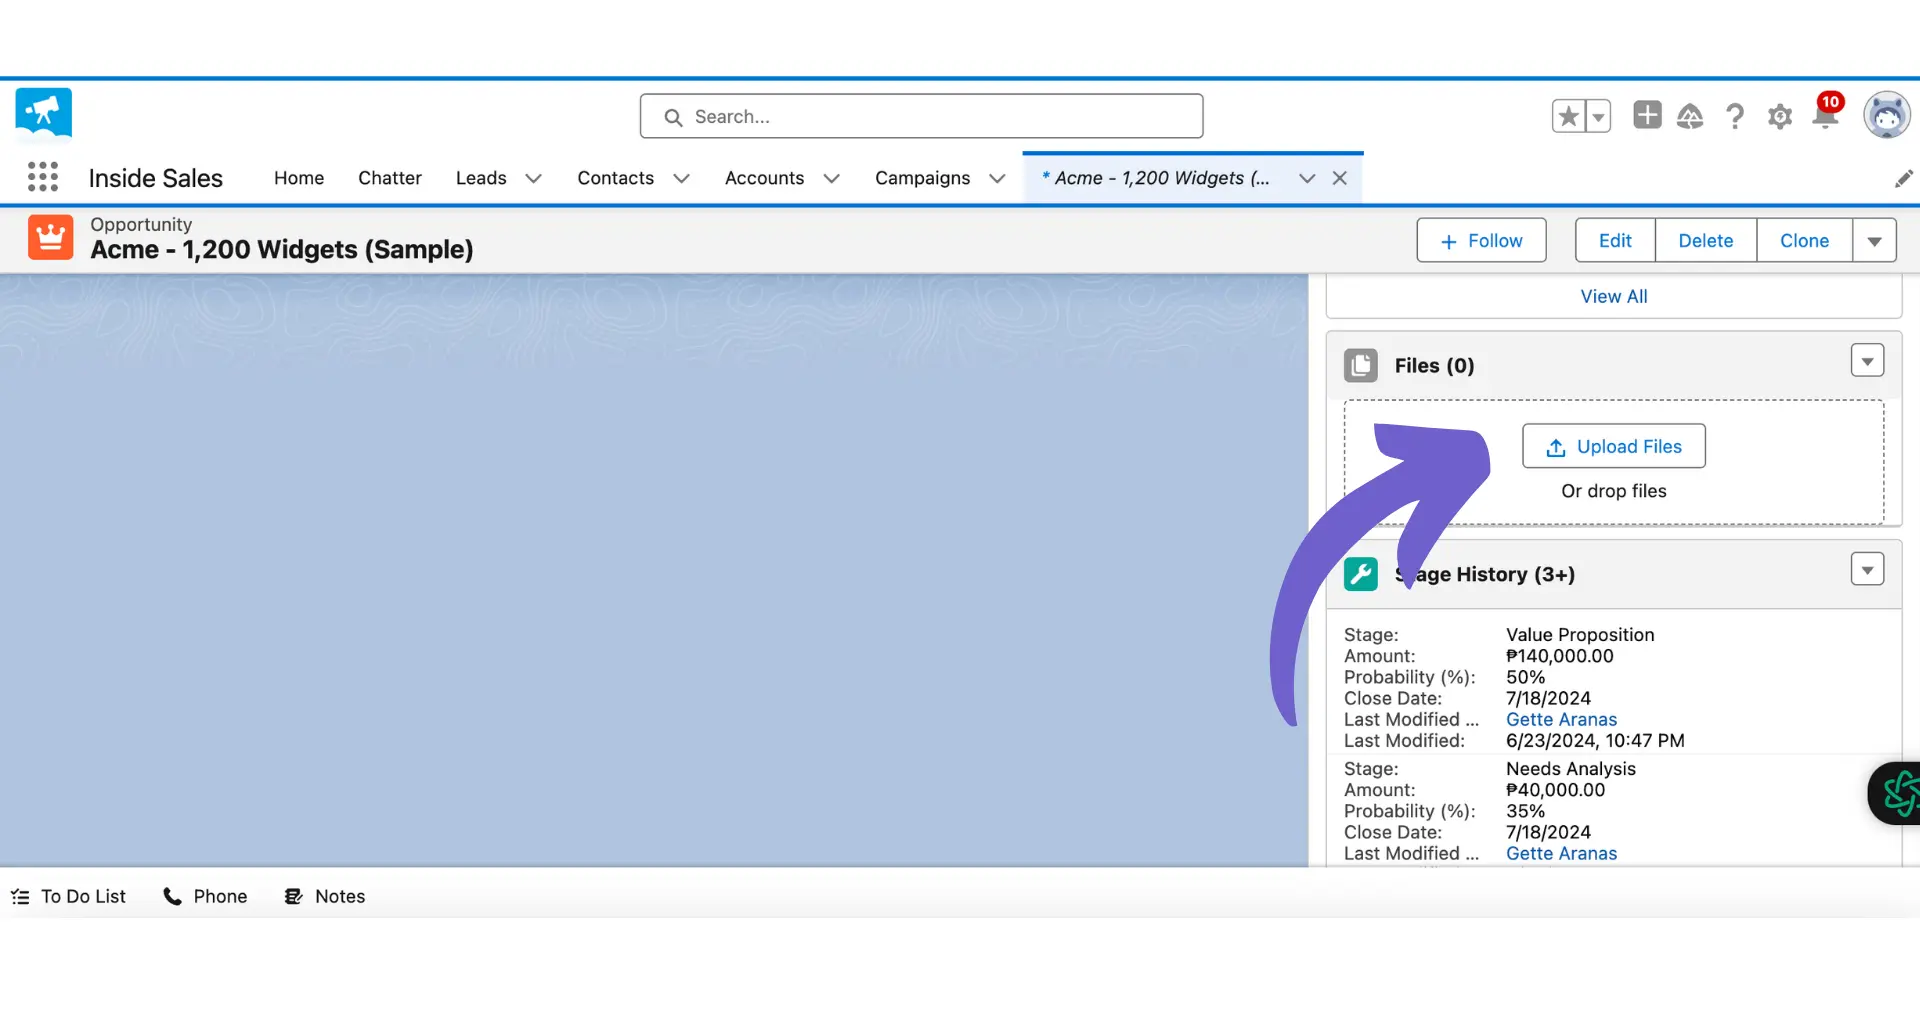
Alternatively, you can also attach files directly to specific records in Salesforce:
Open the record where you want to attach the file.
In Salesforce Classic, click on the 'Attach File' button. In Lightning Experience, click on the 'Related' tab and then the 'Files' related list.
Click 'Upload Files' and select the file(s) from your local machine.
Click 'Done' to attach the file(s) to the record.
Click 'Upload Files' and select the file(s) from your local machine
It's important to note that there is a difference between uploading files to Salesforce Files and attaching files to records. Uploaded files in Salesforce Files are standalone and can be shared and accessed independently, while attached files are tied to specific records and can be accessed from the record's page. For better workflow, consider integrating Dropbox with Salesforce to manage your files more efficiently.
When you need to upload multiple files to Salesforce records in bulk, data loader tools can streamline the process. Here's how to prepare and execute bulk file uploads:
Create a CSV file with columns for the necessary data fields, such as the record ID, file name, and file path.
Ensure that the CSV file is properly structured, with each row representing a file to be uploaded and associated with a specific record.
Use a data loader tool, such as Data Loader or Data Import Wizard, to map the CSV columns to the corresponding Salesforce fields.
Specify the ContentVersion object as the target object for the upload.
Run the data loader to process the CSV file and attach the specified files to their respective Salesforce records.
Data Import Wizard
By using data loader tools for bulk file uploads, you can save time and effort compared to manually uploading files one by one. This method is particularly useful when you have a large number of files to associate with Salesforce records. For further efficiency, consider sales prospecting tools to enhance your data management.
Using the Salesforce User Interface for File Uploads
Salesforce provides a user-friendly interface for uploading files directly within the platform. Here's how to upload files using the Salesforce UI:
Navigate to the 'Files' tab in Salesforce.
Click the 'Upload Files' button to select the file(s) you want to upload from your local device.
Choose the file(s) and click 'Open' to initiate the upload process.
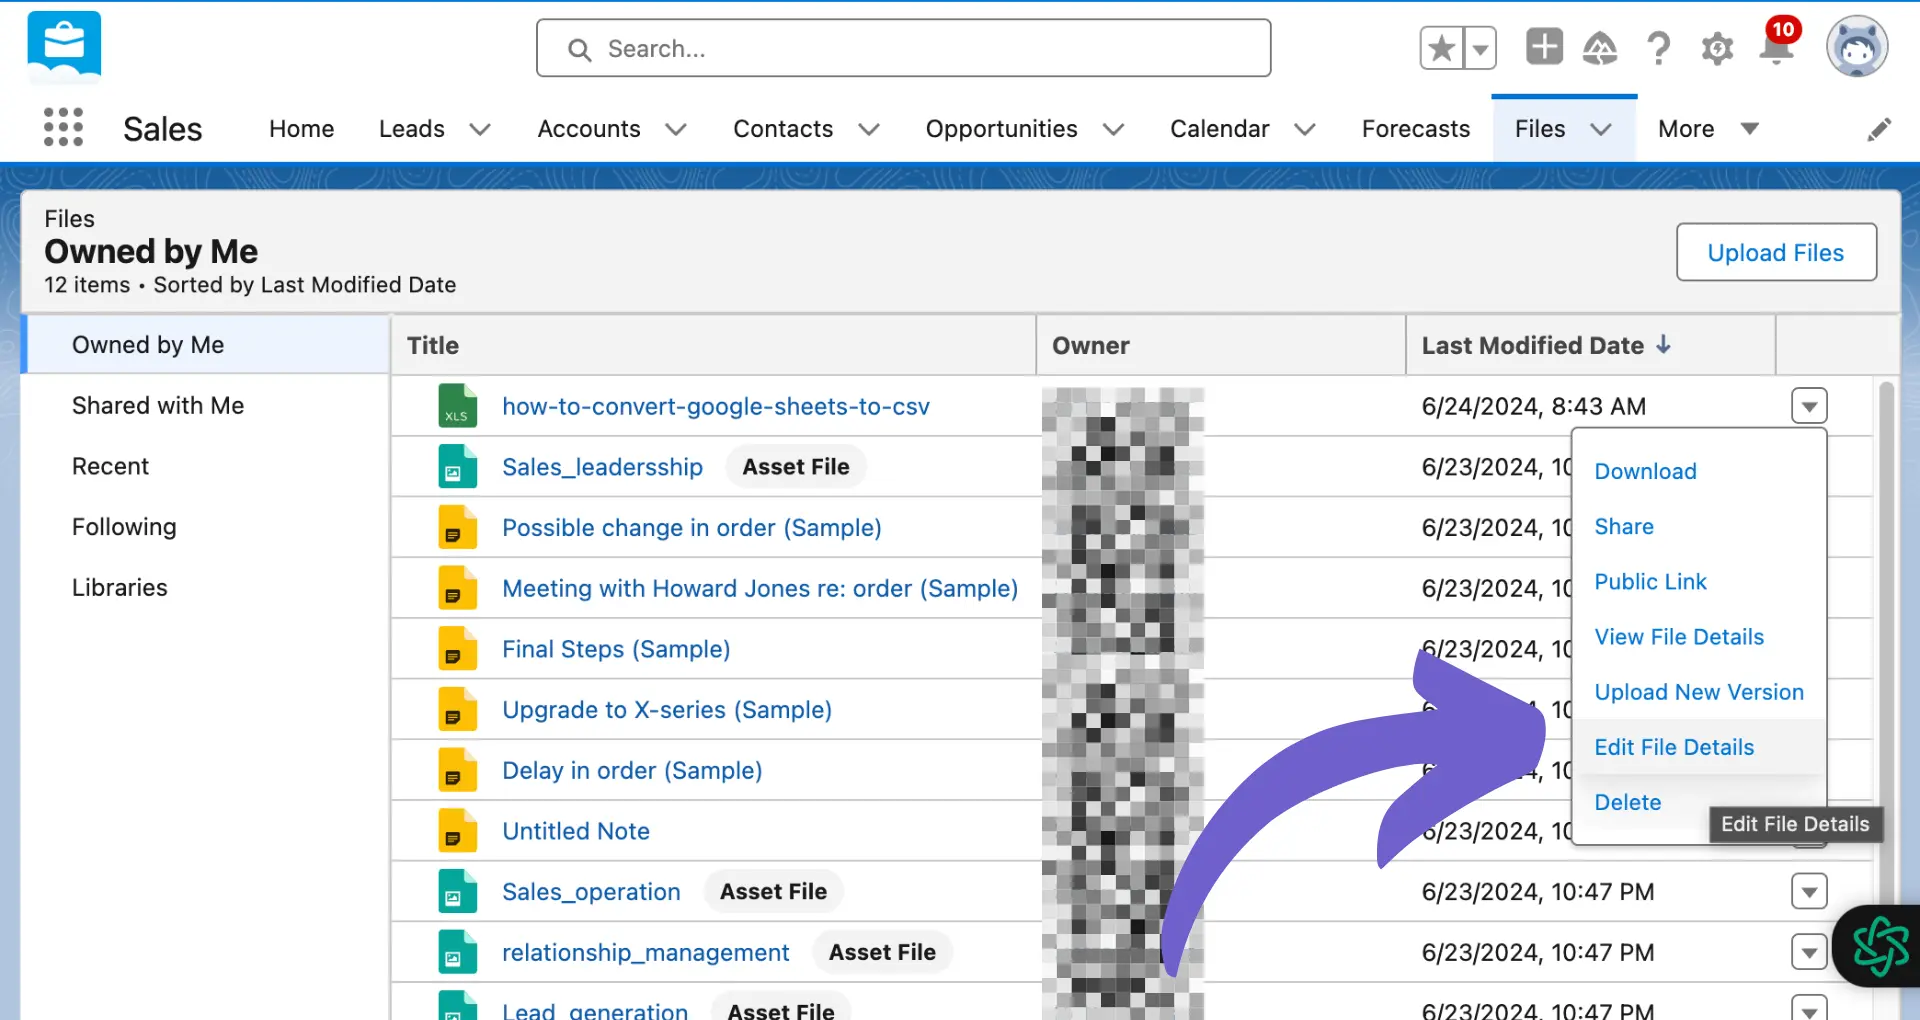
Once uploaded, you can manage and organize the files in the 'Files' tab, including adding descriptions, tags, and sharing settings.
Once uploaded, you can manage and organize the files in the 'Files' tab, including adding descriptions, tags, and sharing settings.
To attach files to specific records:
Open the record you want to associate the file with.
In Salesforce Classic, click the 'Attach File' button in the 'Notes & Attachments' related list. In Lightning Experience, click the 'Upload Files' button in the 'Files' related list.
Select the file(s) you want to attach and click 'Open' to upload them.
The attached files will be accessible from the record's related lists.
The attached files will be accessible from the record's related lists.
If you need to connect Salesforce with other tools like Google Sheets for data integration, many options are available. Note that uploading files to the 'Files' tab makes them accessible across Salesforce, while attaching files to records associates them with specific records for easy reference.
Leveraging Chatter for File Management and Collaboration
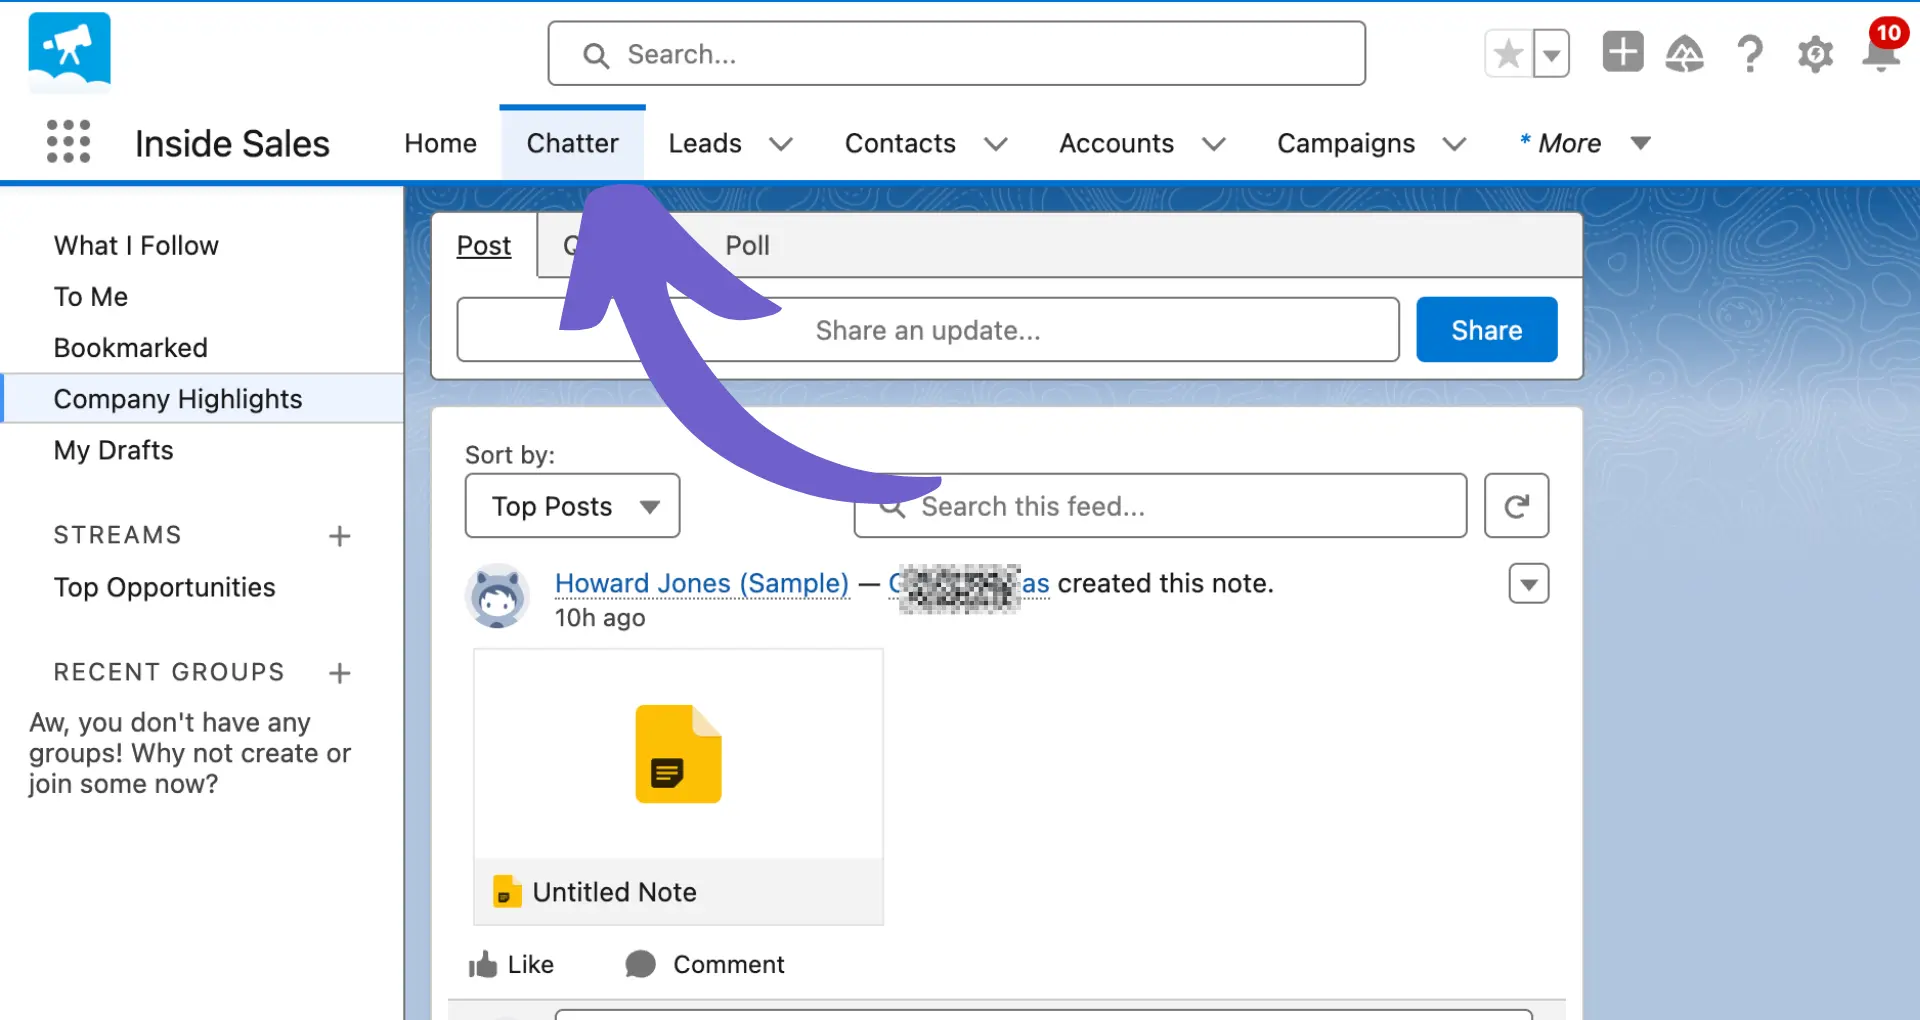
Salesforce Chatter is a powerful tool for file management and collaboration within the platform. Here's how to leverage Chatter for efficient file sharing and teamwork:
Salesforce Chatter
Upload files to Chatter feeds or groups to share them with specific teams or individuals.
Use the file version control feature to track changes and maintain a history of file updates.
Collaborate on documents by posting comments, mentioning colleagues, and assigning tasks related to the files.
Enable file tracking and following to receive notifications when files are modified or updated.
The benefits of using Chatter for file management and collaboration include:
Centralized file storage and access within Salesforce
Real-time collaboration and communication around files
Simplified file version control and change tracking
Improved team productivity and project management
By integrating file management with Chatter's social features, teams can streamline their workflows, reduce email clutter, and ensure everyone is working with the most up-to-date files. For even more efficiency, consider how you can connect Google Docs for seamless document collaboration.
Custom File Upload Solutions Using Lightning Web Components (LWC)
Salesforce Lightning Web Components (LWC) provide a powerful framework for creating custom file upload solutions tailored to your organization's specific needs. Here's an overview of the process:
Create a new LWC component that includes an HTML file upload input and any additional UI elements.
In the JavaScript controller, handle the file selection event and use the FileReader API to read the selected file(s) as data URLs or ArrayBuffers.
Send the file data to an Apex controller method using the @wire decorator or imperative Apex calls.
In the Apex controller, convert the received file data into ContentVersion records and insert them into Salesforce.
Optionally, create ContentDocumentLink records to associate the uploaded files with specific records.
Some examples of custom behaviors you can implement with LWC file upload components include:
File preview: Display a preview of the selected file(s) before uploading, such as image thumbnails or document icons.
Multiple file uploads: Allow users to select and upload multiple files simultaneously.
Drag and drop support: Enable users to drag files from their desktop directly into the upload component.
Progress tracking: Show upload progress indicators and allow users to cancel uploads in progress.
Error handling: Display user-friendly error messages for invalid file types, size limits, or other validation failures.
Guest user uploads: Implement secure file uploads for unauthenticated guest users in Experience Cloud sites.
By leveraging LWC and Apex, you can create custom file upload solutions that integrate seamlessly with Salesforce and provide an enhanced user experience for your specific use case.
Connect Microsoft Excel with Bardeen to automate data migration and save time on repetitive tasks.
Automating File Uploads with Salesforce REST API
Salesforce developers can leverage the REST API to automate file uploads programmatically, providing a more efficient and scalable solution compared to manual uploads. Here's how to use the REST API for file uploads:
Create a ContentVersion record with the necessary fields, including:some text
Title: The name of the file.
PathOnClient: The full path of the file, including the file extension.
VersionData: The base64-encoded file data.
FirstPublishLocationId: The ID of the record to associate the file with (optional).
Send a POST request to the /services/data/v{version}/sobjects/ContentVersion endpoint with the ContentVersion record in the request body.
If the FirstPublishLocationId field is not set, you can create a ContentDocumentLink record to relate the uploaded file to a specific record using the ContentDocumentId from the ContentVersion response.
When handling file metadata, consider the following:
Set the Description field to provide additional context about the file.
Use the TagCsv field to add tags for easier searching and categorization.
Specify the Language field for localization purposes.
Set the IsMajorVersion field to true to indicate a major version of the file.
To relate uploads to specific Salesforce records using the API:
Retrieve the ContentDocumentId from the ContentVersion record created during the upload process.
Create a new ContentDocumentLink record with the following fields:some text
ContentDocumentId: The ID of the uploaded file.
LinkedEntityId: The ID of the record to associate the file with.
ShareType: Determines the visibility of the file (Viewer, Collaborator, or Inferred).
Note that file uploads via the REST API have a size limit of 50 MB per request. For larger files, use the Bulk API or split the file into smaller chunks and upload them separately.