Creating New Gmail Labels on Mobile: A Step-by-Step Guide

LAST UPDATED
June 6, 2024
Jason Gong
TL;DR

Use a web browser on Android or the Gmail app on iPhone/iPad to create labels.

By the way, we're Bardeen, we build a free AI Agent for doing repetitive tasks.

Since you're managing Gmail labels, you might love Bardeen's automation for Gmail. It can automate label creation and other email tasks, saving you time and effort.

Why can't I create a new label in Gmail app

If you're struggling to create a new label directly in the Gmail app on your Android device, it's because this functionality is not available in the mobile app. However, you can still create labels by using a web browser to access the desktop version of Gmail. On the other hand, if you're using an iPhone or iPad, you can create labels directly within the Gmail app. Here's how you can create labels in both scenarios:

Creating Labels on Android

  1. Open a web browser on your Android device and go to https://www.gmail.com.

       2. Sign in with your Gmail account.

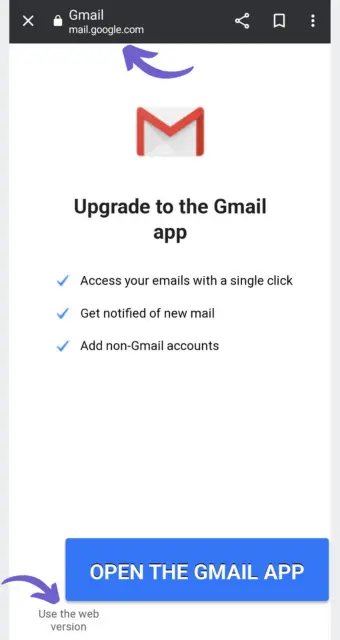
       3. Decline the prompt to use the Gmail app by selecting 'Use the web version' or 'I am not interested'.

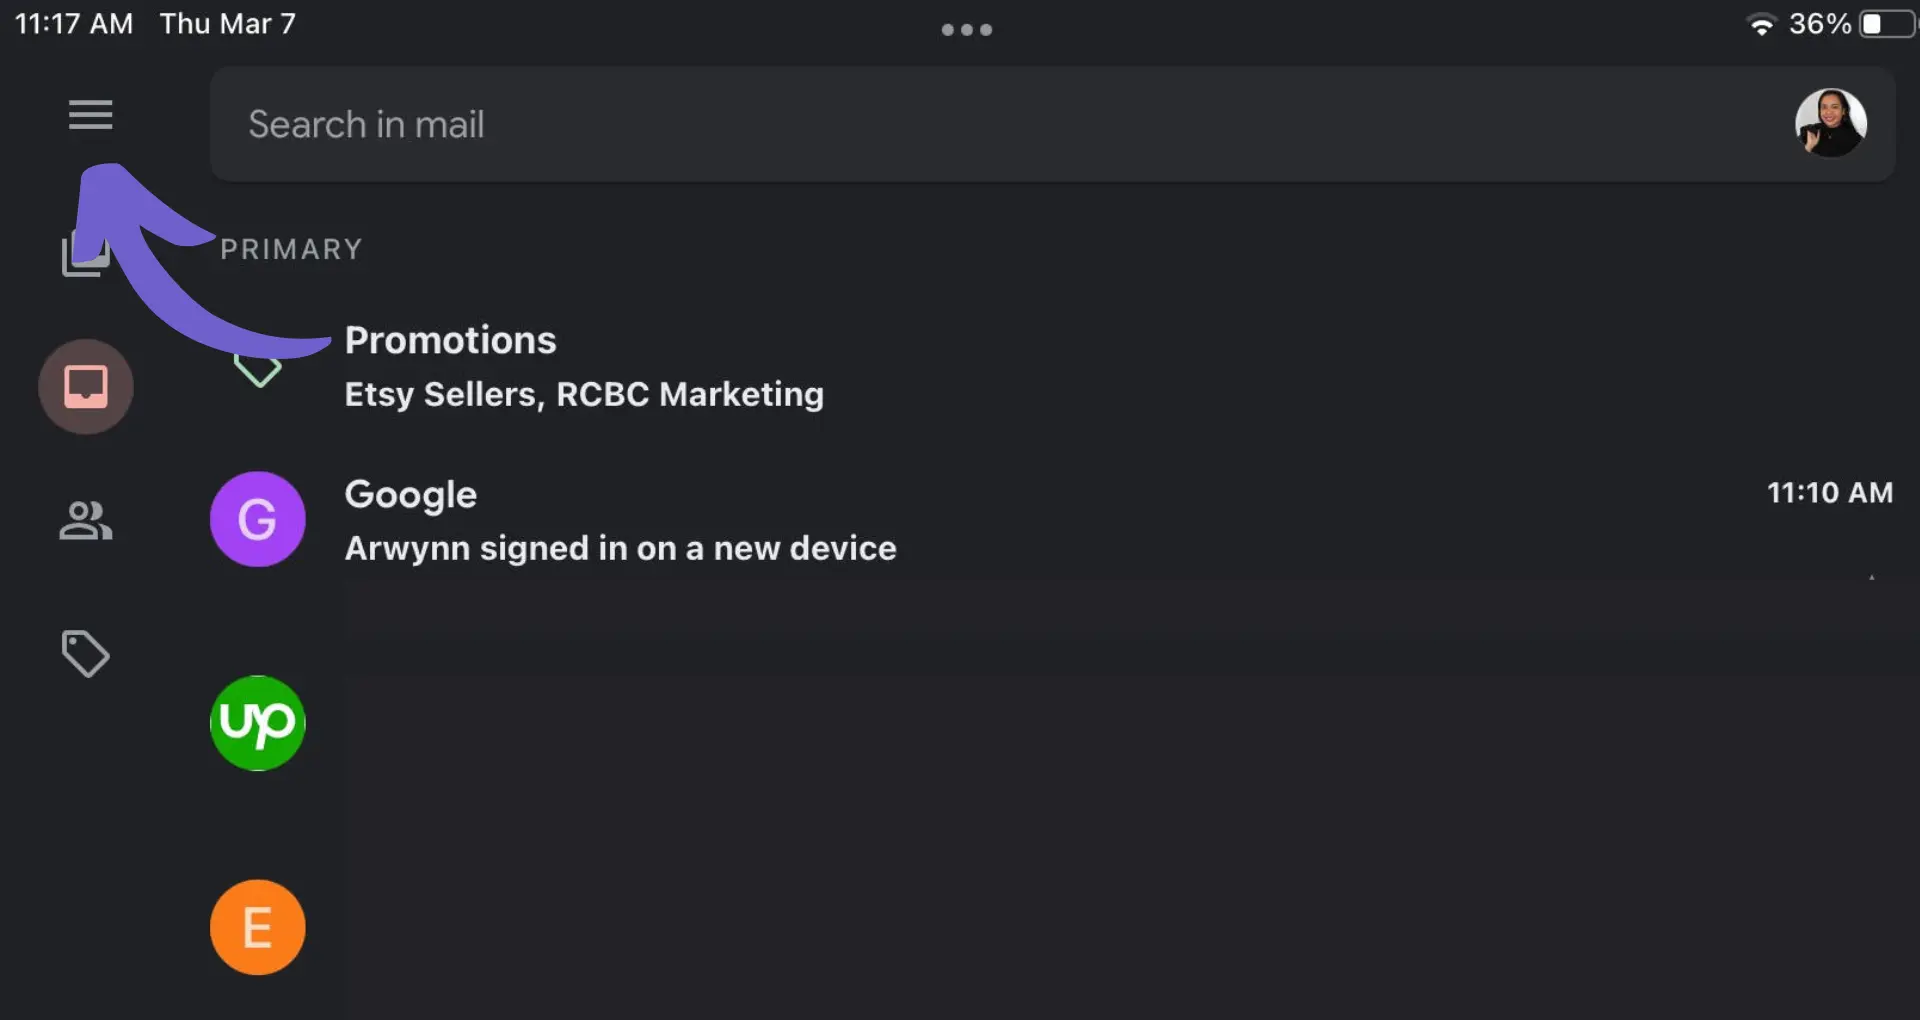
       4. Tap the three-line menu ☰ at the top-left corner.

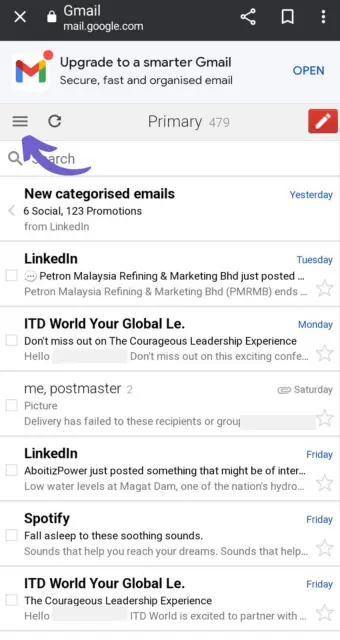
       5. Scroll down and tap 'Desktop' to switch to the desktop version of Gmail.

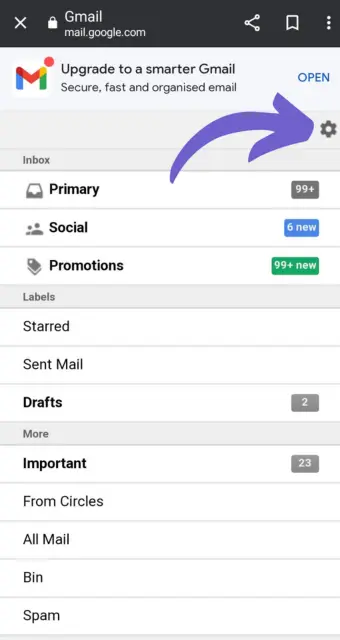
       6. Tap the gear icon or 'Settings' at the top-right corner. You may need to select 'See all settings' if you're using a tablet.

       7. Tap the 'Labels' tab to view existing labels and the option to create a new one.

       8. Enter a name for your new label and tap 'Create'. If you don't see a field to type in, tap 'Create new label' first.

       9. To assign the new label to a message in the Gmail mobile app, open the app, tap the message, tap the three vertical dots, select 'Change labels', choose your label, and tap 'OK'.

Creating Labels on iPhone/iPad

  1. Open the Gmail app on your iPhone or iPad.
  2. Tap the three-line menu ☰ at the top-left corner.

       2. Scroll down and tap '+ Create new' under the 'Labels' section.

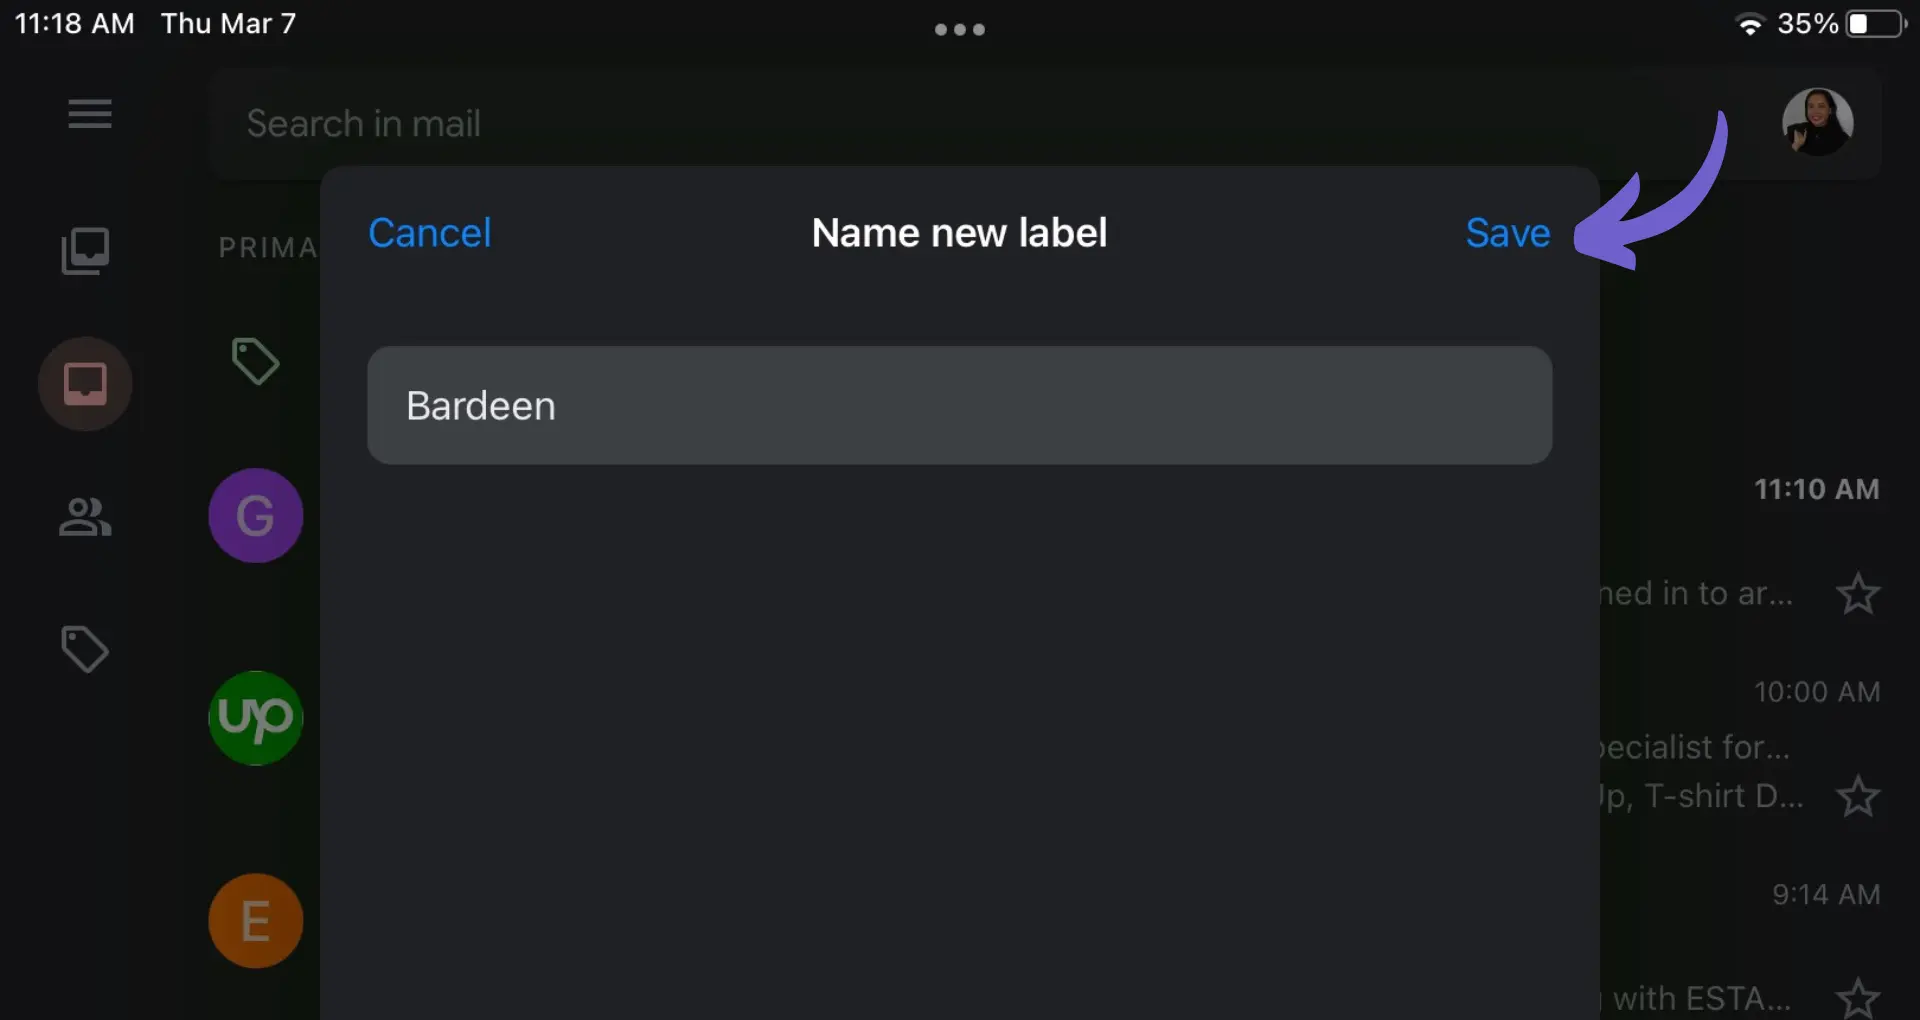
      3. Type a name for your label and tap 'Save'.

      4. To assign the new label to a message, go back to your inbox, tap the message, tap the three horizontal dots, select 'Label', choose the label(s) you want to assign, and tap the checkmark to save.

By following these steps, you can effectively manage your emails by creating and assigning labels in Gmail, whether you're using an Android device or an iPhone/iPad.

Automate Your Gmail: Boost Email Productivity with Bardeen

While the Gmail app may limit some functionalities such as creating new labels directly on mobile devices, automating your email tasks using Bardeen can optimize your productivity and ensure that your email management is as efficient and streamlined as possible.

For instance, integrating Gmail with other tools can automate processes such as task creation and lead management directly from your inbox. Here are a few examples of what you can automate using Bardeen:

  1. Create ClickUp task when label is added to an email: This playbook triggers the creation of a task in ClickUp whenever a specific label is added to an email in Gmail, ensuring that you never miss actioning an important email.
  2. Save labeled emails to ClickUp, including attachments stored on Google Drive: Automate the saving of emails labeled for specific projects or topics as tasks in ClickUp, including their attachments by uploading them to Google Drive.
  3. Save labeled emails to Google Sheets, including attachments stored on Google Drive: This playbook allows you to save emails with a specific label to Google Sheets, streamlining document organization and ensuring important attachments are systematically stored and easily accessible.

Explore these playbooks to automate your email management and integrate your Gmail with productive tools seamlessly.

Contents
Automate Gmail Label Creation with Bardeen

Bardeen's AI Agent can automate your Gmail label tasks in seconds.

Get Bardeen free

Related frequently asked questions

Enable Salesforce Field History Tracking in 5 Steps

Learn to enable Salesforce field history tracking in 5 steps to monitor data changes, ensuring audit compliance and data integrity effectively.

Read more
Import PDF to Google Sheets: A Step-by-Step Guide

Learn how to import PDF into Google Sheets using Google Docs, CSV conversion, or third-party tools. Ideal for data analysis and complex document conversions.

Read more
Web Scraping with Google Sheets: A Step-by-Step Guide

Learn how to web scrape with Google Sheets using built-in functions and Apps Script for dynamic content, suitable for coders and non-coders alike.

Read more
Adding Fonts to HubSpot: A Step-by-Step Guide

Learn how to add fonts to HubSpot, including default, Google, and custom fonts, to enhance your content and maintain brand consistency.

Read more
Easy Excel to Google Sheets Conversion Guide

Learn how to convert Excel to Google Sheets without losing formatting, including macros conversion and automatic updates for seamless data management.

Read more
Convert Text to Number in Google Sheets: Easy Steps

Learn how to convert text to numbers in Google Sheets using VALUE function, number formatting, and advanced techniques for accurate data analysis.

Read more
how does bardeen work?

Your proactive teammate — doing the busywork to save you time

Integrate your apps and websites

Use data and events in one app to automate another. Bardeen supports an increasing library of powerful integrations.

Perform tasks & actions

Bardeen completes tasks in apps and websites you use for work, so you don't have to - filling forms, sending messages, or even crafting detailed reports.

Combine it all to create workflows

Workflows are a series of actions triggered by you or a change in a connected app. They automate repetitive tasks you normally perform manually - saving you time.

get bardeen

Don't just connect your apps, automate them.

200,000+ users and counting use Bardeen to eliminate repetitive tasks

Effortless setup
AI powered workflows
Free to use
Reading time
Thank you! Your submission has been received!
Oops! Something went wrong while submitting the form.
By clicking “Accept”, you agree to the storing of cookies. View our Privacy Policy for more information.